
Replicant
FreeNot checkedBuild, test, and debug Android apps through AI-driven emulator control and UI automation.

About
Build, test, and debug Android apps through AI-driven emulator control and UI automation.
README
Let AI build, test, and debug your Android apps.
CI npm Node.js License: MIT Ask DeepWiki replicant-mcp MCP server
replicant-mcp is a Model Context Protocol server that gives AI assistants like Claude the ability to interact with your Android development environment. Build APKs, launch emulators, install apps, navigate UIs, and debug crashes—all through natural conversation.
Demo
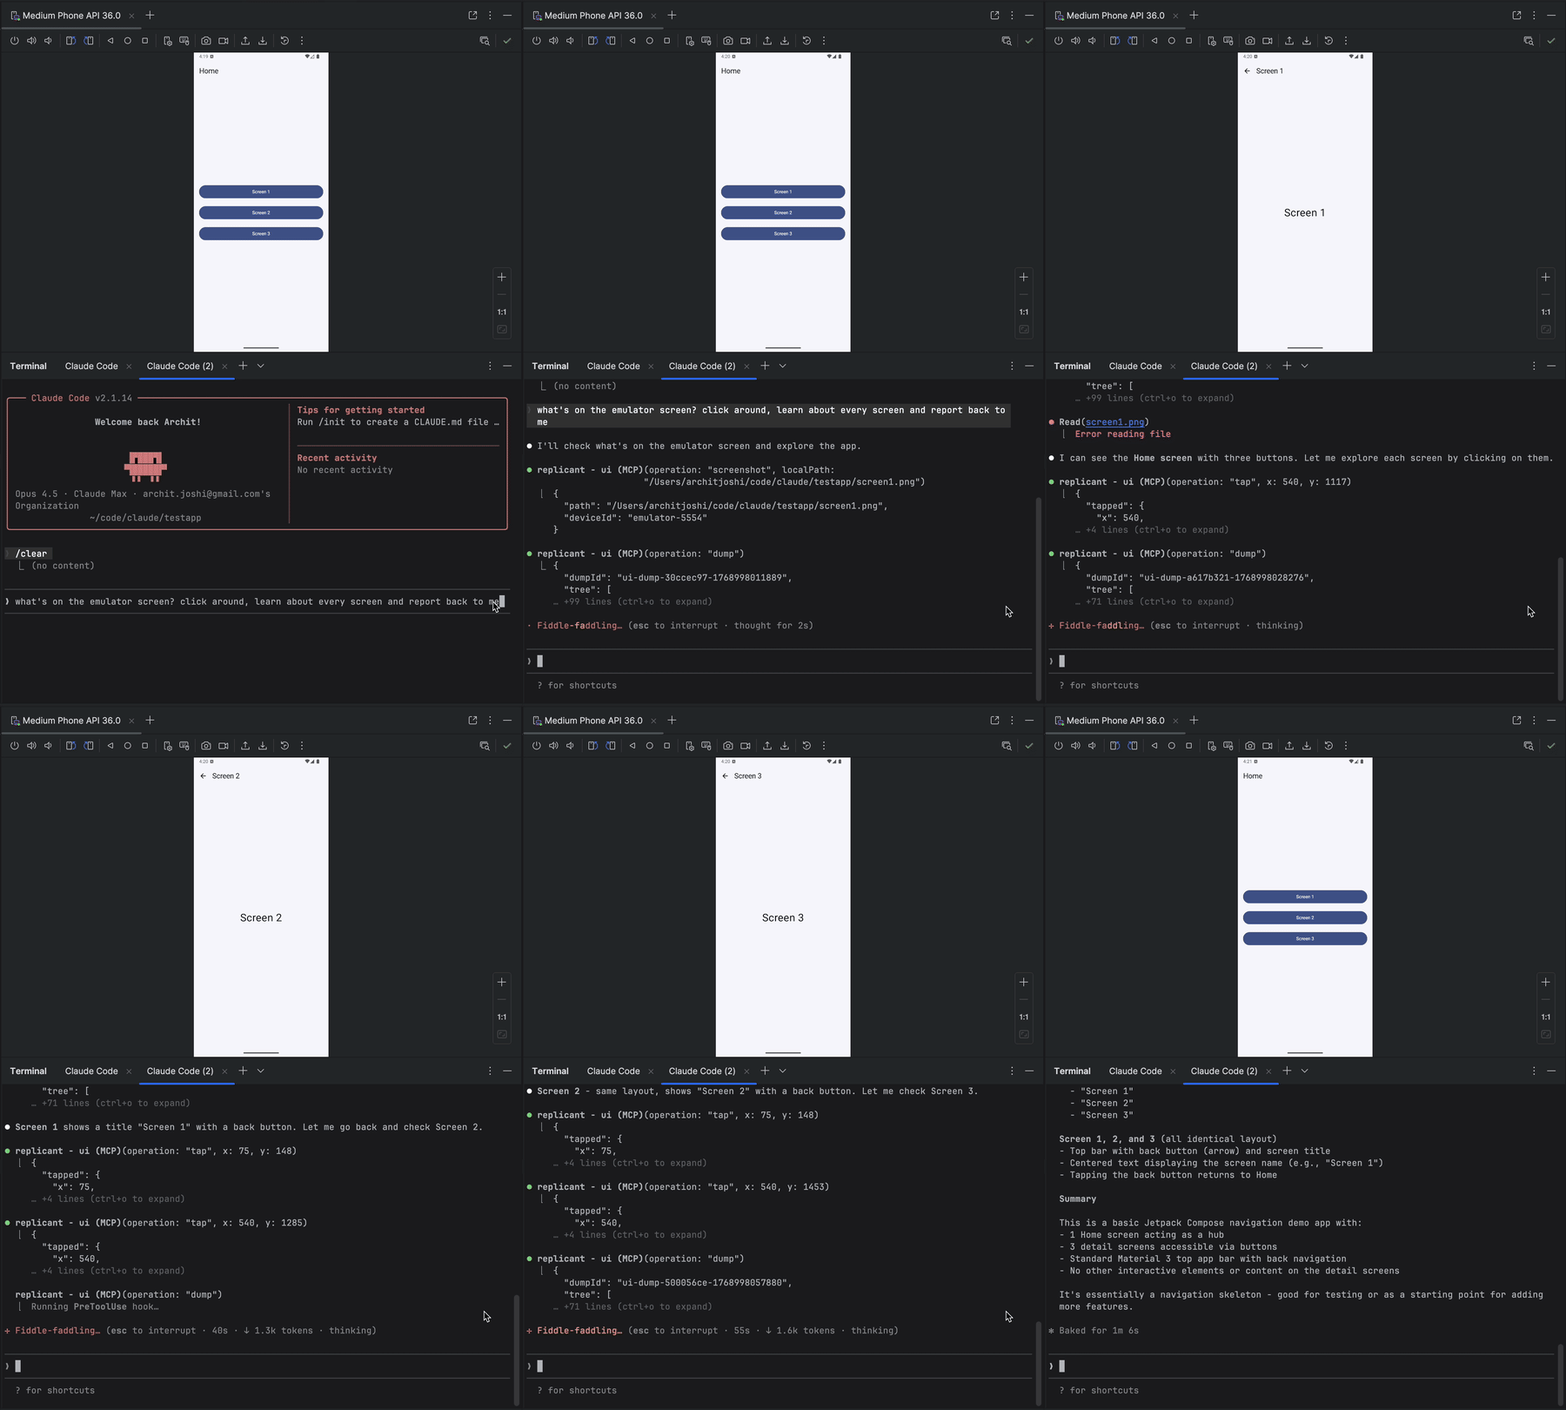
Why replicant-mcp?
| Without replicant-mcp | With replicant-mcp |
|---|---|
"Run ./gradlew assembleDebug, then adb install, then adb shell am start..." |
"Build and run the app" |
| Copy-paste logcat output, lose context | AI reads filtered logs directly |
| Screenshot → describe UI → guess coordinates | AI sees accessibility tree, taps elements by text |
| 5,000 tokens of raw Gradle output | 50-token summary + details on demand |
Features
| Category | Capabilities |
|---|---|
| Build & Test | Build APKs/bundles, run unit and instrumented tests, list modules/variants/tasks, test regression detection with baseline comparison |
| Emulator | Create, start, stop, wipe emulators; save/load/delete snapshots |
| Device Control | List connected devices, select active device, query device properties |
| App Management | Install, uninstall, launch, stop apps; clear app data |
| Log Analysis | Filter logcat by package, tag, level, time |
| UI Automation | Accessibility-first element finding, spatial proximity search, tap, text input, screenshots |
| Diagnostics | Environment health checks via replicant doctor; structured logging with configurable level and format |
Coming Soon
- Custom build commands (project-specific overrides, auto-detect gradlew)
- Video capture (start/stop recording, duration-based capture)
Quick Start
Prerequisites
- Node.js 18+
- Android SDK with
adbandemulatorin your PATH - An Android project with
gradlew(for build tools)
node --version      # Should be 18+
adb --version       # Should show Android Debug Bridge version
emulator -version   # Should show Android emulator version
Installing prerequisites (macOS via Homebrew)
If you don't already have these tools, install them with Homebrew:
Node.js 18+
brew install node
Physical-device only — just adb, sufficient if you never run an emulator:
brew install --cask android-platform-tools
adb lands directly on your PATH; no further config needed.
Full Android SDK — needed for emulator workflows or building APKs via the gradle-* tools. Run the steps in order:
# 1. JDK — required by sdkmanager itself, and by the gradle-* tools
brew install --cask temurin@17

# 2. cmdline-tools (provides sdkmanager)
brew install --cask android-commandlinetools

# 3. Set ANDROID_HOME and create the directory BEFORE running sdkmanager,
#    otherwise sdkmanager has no install target.
export ANDROID_HOME="$HOME/Library/Android/sdk"
mkdir -p "$ANDROID_HOME"

# 4. Accept all SDK licenses first, then install packages.
#    `sdkmanager --install` aborts on unaccepted per-package licenses
#    (e.g. the Google APIs system image) if licenses aren't accepted first.
#    The system-image arch must match your host: `arm64-v8a` for Apple
#    Silicon (M1/M2/M3), `x86_64` for Intel Macs. Check with `uname -m`.
yes | sdkmanager --licenses
sdkmanager --install "platform-tools" "emulator" "system-images;android-34;google_apis;arm64-v8a"
Persist ANDROID_HOME and put the SDK binaries on your PATH by appending to ~/.zshrc (or ~/.bashrc):
export ANDROID_HOME="$HOME/Library/Android/sdk"
export PATH="$ANDROID_HOME/platform-tools:$ANDROID_HOME/emulator:$PATH"
Installation
npm install -g replicant-mcp
After installation, run the built-in diagnostics to verify your environment:
replicant doctor
Updating
npm update -g replicant-mcp
Setup
Claude Desktop
Add to ~/Library/Application Support/Claude/claude_desktop_config.json (macOS) or %APPDATA%\Claude\claude_desktop_config.json (Windows):
{
  "mcpServers": {
    "replicant": {
      "command": "npx",
      "args": ["-y", "replicant-mcp"]
    }
  }
}
Claude Code
claude mcp add replicant -- npx -y replicant-mcp
Cursor
Add to ~/.cursor/mcp.json (global) or .cursor/mcp.json (project):
{
  "mcpServers": {
    "replicant": {
      "command": "npx",
      "args": ["-y", "replicant-mcp"]
    }
  }
}
Windsurf
Add to ~/.codeium/windsurf/mcp_config.json:
{
  "mcpServers": {
    "replicant": {
      "command": "npx",
      "args": ["-y", "replicant-mcp"]
    }
  }
}
OpenAI Codex CLI
Add to ~/.codex/config.toml:
[mcp_servers.replicant]
command = "npx"
args = ["-y", "replicant-mcp"]
Or via CLI:
codex mcp add replicant -- npx -y replicant-mcp
Note: Ensure
adbandemulatorare in your PATH, or setANDROID_HOMEenvironment variable. On macOS:~/Library/Android/sdk, on Linux:~/Android/Sdk.
Example
You: "I just changed the checkout flow. Build the app, go through checkout
      with a test product, and make sure the confirmation screen shows up."

Claude: [Builds debug APK, installs on emulator, launches app]
        [Taps "Electronics" category → "Wireless Headphones" → "Add to Cart"]
        [Navigates to cart, taps "Checkout"]
        [Fills shipping form, taps "Place Order"]

        Confirmation screen is showing:
        - Order #38291
        - "Wireless Headphones" × 1
        - Total: $79.99
        - Estimated delivery: Jan 30

        The flow works. Want me to test the edge cases—empty cart,
        invalid address, payment failure?
Design
replicant-mcp uses progressive disclosure (summaries first, details on demand) to minimize token usage, and accessibility-first UI automation for faster, cheaper, more reliable interactions than screenshot-based approaches. See docs/architecture.md for details.
More Info
- Configuration: Set
REPLICANT_CONFIGfor advanced options. See docs/configuration.md. - Logging: Set
REPLICANT_LOG_LEVEL(error,warn,info,debug) andREPLICANT_LOG_FORMAT(jsonfor structured output) to control server logging. Logs are written to stderr. - Troubleshooting: Common issues and solutions in docs/troubleshooting.md.
- Tool documentation: Ask Claude to call
rtfmwith a category like "build", "adb", "emulator", or "ui".
Documentation
| Document | Description |
|---|---|
| Architecture | Design overview and progressive disclosure pattern |
| Configuration | Config file reference, environment variables, Gradle setup |
| API Stability | Tool API versioning policy and deprecation process |
| Security Model | adb-shell safety model, command denylist, threat boundaries |
| Support Matrix | Tested OS, Node.js, Android SDK, and emulator versions |
| Known Limitations | Accessibility gaps, timeouts, single-device focus, and more |
| Artifacts | .replicant/ directory contents and privacy considerations |
| Troubleshooting | Common issues and solutions |
| Changelog | Version history |
| Security Policy | Vulnerability reporting process |
| Support / Getting Help | How to report bugs and ask questions |
| Contributing | Development setup and guidelines |
Contributing
See CONTRIBUTING.md for development setup and guidelines.
Acknowledgments
- Inspired by xc-mcp for iOS
- Built on the Model Context Protocol
License
Questions? Open an issue
Install Replicant in Claude Desktop, Claude Code & Cursor
unyly install replicantInstalls into Claude Desktop, Claude Code, Cursor & VS Code — handles npx, uvx and build-from-source repos for you.
First time? Get the CLI: curl -fsSL https://unyly.org/install | sh
Or configure manually
Run in your terminal:
claude mcp add replicant -- npx -y replicant-mcpStep-by-step: how to install Replicant
FAQ
Is Replicant MCP free?
Yes, Replicant MCP is free — one-click install via Unyly at no cost.
Does Replicant need an API key?
No, Replicant runs without API keys or environment variables.
Is Replicant hosted or self-hosted?
Self-hosted: the server runs locally on your machine via the install command above.
How do I install Replicant in Claude Desktop, Claude Code or Cursor?
Open Replicant on unyly.org, pick your client tab (Claude Desktop, Claude Code, Cursor) and press Install — the config is generated automatically, no JSON editing.
Related MCPs
LibreOffice Tools
Enables AI agents to read, write, and edit Office documents via LibreOffice with token-efficient design. Supports multiple formats including DOCX, XLSX, PPTX, a
 by passerbyflutter
dannote/figma-use
Full Figma control: create shapes, text, components, set styles, auto-layout, variables, export. 80+ tools.
 by dannote
Logo.dev
Search and retrieve company logos by brand or domain. Customize size, format, and theme to match your design needs. Accelerate design, prototyping, and content
 by NOVA-3951
Design Inspiration Server
Searches top design platforms like Dribbble and Behance to provide UI inspiration, color palettes, and layout patterns via the Serper API. It allows users to re
 by YonasValentin
Compare Replicant with
Not sure what to pick?
Find your stack in 60 seconds
Author?
Embed badge for your README
Browse similar
All design MCPs