
Apify Store API Server
БесплатноНе проверенEnables querying the Apify Store to retrieve structured data on public Actors including pricing, usage trends, ratings, and categories. Integrates with AI agent

Описание
Enables querying the Apify Store to retrieve structured data on public Actors including pricing, usage trends, ratings, and categories. Integrates with AI agents for market research and competitor tracking.
README
Extract pricing, usage trends, reliability, ratings, and categories for every public Actor in the Apify Store, as clean structured JSON.
- Actor landing page: https://apify.com/johnvc/store-actor-intelligence-api?fpr=9n7kx3
- Get a free API key: https://apify.com?fpr=9n7kx3
This API reads the Apify Store and returns one row per Actor with the data that actually matters for analysis: the pricing model and per-event price ladder, total and 7/30/90-day active users, total runs and builds, a 30-day success rate, bookmark counts, and review ratings, plus the title, developer, categories, and description. Filter by keyword, category, pricing model, or developer, or sweep the entire Store in a single run. Built for market research, competitor tracking, pricing analysis, and AI agents.
🎬 Video Walkthrough
🚀 Quick Start (Python + uv)
Prerequisites: Python 3.11+ and a free Apify API key (https://apify.com?fpr=9n7kx3).
# 1. Install uv if you do not have it
curl -LsSf https://astral.sh/uv/install.sh | sh

# 2. Clone and enter the repo
git clone https://github.com/johnisanerd/Apify-Store-API.git
cd Apify-Store-API

# 3. Install dependencies
uv sync

# 4. Add your API key
cp .env.example .env        # then paste your APIFY_API_TOKEN

# 5. Run the example
uv run python store-api-example.py
✨ Why use this API
- The whole catalog, structured. One run returns every public Store Actor as JSON, no manual copying from listing pages.
- Real commercial signals. Pricing model, per-event prices, total and monthly users, run volume, and a computed 30-day success rate, all in one row.
- Filter or sweep. Narrow by keyword, category, pricing model, or developer, or set
maxItems: 0to pull the entire Store. - Track changes over time. Run it on a schedule to watch pricing moves, new entrants, and reliability trends across the marketplace.
- MCP-ready. Hand it to Claude, Cursor, or ChatGPT as a live tool (see the install sections below).
- Cheapest in its class. Pay-per-result pricing with no per-run fee, so even a full-catalog sweep costs very little. See the current price on the Store card.
🧪 Usage Examples
Basic (top Actors in one category):
{
  "category": "AI",
  "sortBy": "popularity",
  "maxItems": 25
}
Advanced (free social-media Actors, with full README and input schema for each):
{
  "search": "instagram",
  "category": "SOCIAL_MEDIA",
  "pricingModel": "FREE",
  "sortBy": "popularity",
  "maxItems": 10,
  "includeDetails": true
}
⚙️ Input Parameters
| Parameter | Type | Required | Default | Description |
|---|---|---|---|---|
search |
string | No | (none) | Keyword filter across title, name, description, developer, and README. |
category |
enum | No | (all) | One of 25 Store categories: AI, AGENTS, AUTOMATION, BUSINESS, DEVELOPER_TOOLS, ECOMMERCE, LEAD_GENERATION, MARKETING, NEWS, SEO_TOOLS, SOCIAL_MEDIA, TRAVEL, REAL_ESTATE, JOBS, EDUCATION, GAMES, VIDEOS, SPORTS, INTEGRATIONS, MCP_SERVERS, OPEN_SOURCE, FOR_CREATORS, COVID_19, DEVELOPER_EXAMPLES, OTHER. |
pricingModel |
enum | No | (all) | FREE, FLAT_PRICE_PER_MONTH, PRICE_PER_DATASET_ITEM, or PAY_PER_EVENT. |
username |
string | No | (all) | Filter to one developer handle (e.g. apify). |
sortBy |
enum | No | relevance |
relevance, popularity, newest, or lastUpdate. |
maxItems |
integer | No | 1000 |
Maximum Actors to return. Set to 0 for the entire Store (~33,000+). |
offset |
integer | No | 0 |
Skip this many Actors first (resume or shard a large run). |
includeDetails |
boolean | No | false |
Also pull each Actor's full README and input schema (1-2 extra calls per Actor). |
📦 Output Format
Each dataset item is one Store Actor. Representative row:
{
  "result_type": "actor",
  "actorId": "aYG0l9s7dbB7j3gbS",
  "name": "website-content-crawler",
  "username": "apify",
  "title": "Website Content Crawler",
  "url": "https://apify.com/apify/website-content-crawler",
  "categories": ["AI", "DEVELOPER_TOOLS", "BUSINESS"],
  "totalUsers": 21786,
  "monthlyUsers": 3355,
  "totalUsers7Days": 1307,
  "totalUsers90Days": 7260,
  "totalRuns": 4894213,
  "totalBuilds": 202,
  "runs30DaysTotal": 511458,
  "runs30DaysSucceeded": 496871,
  "successRate30Days": 97.15,
  "bookmarkCount": 491,
  "reviewRating": 4.8,
  "pricingModel": "FREE",
  "apifyMarginPercentage": 0.2,
  "scrapedAt": "2026-06-29T18:00:00+00:00"
}
With includeDetails: true, each row also carries readme, inputSchema, seoTitle, seoDescription, isDeprecated, and latestVersion.
Install in Claude Cowork Desktop
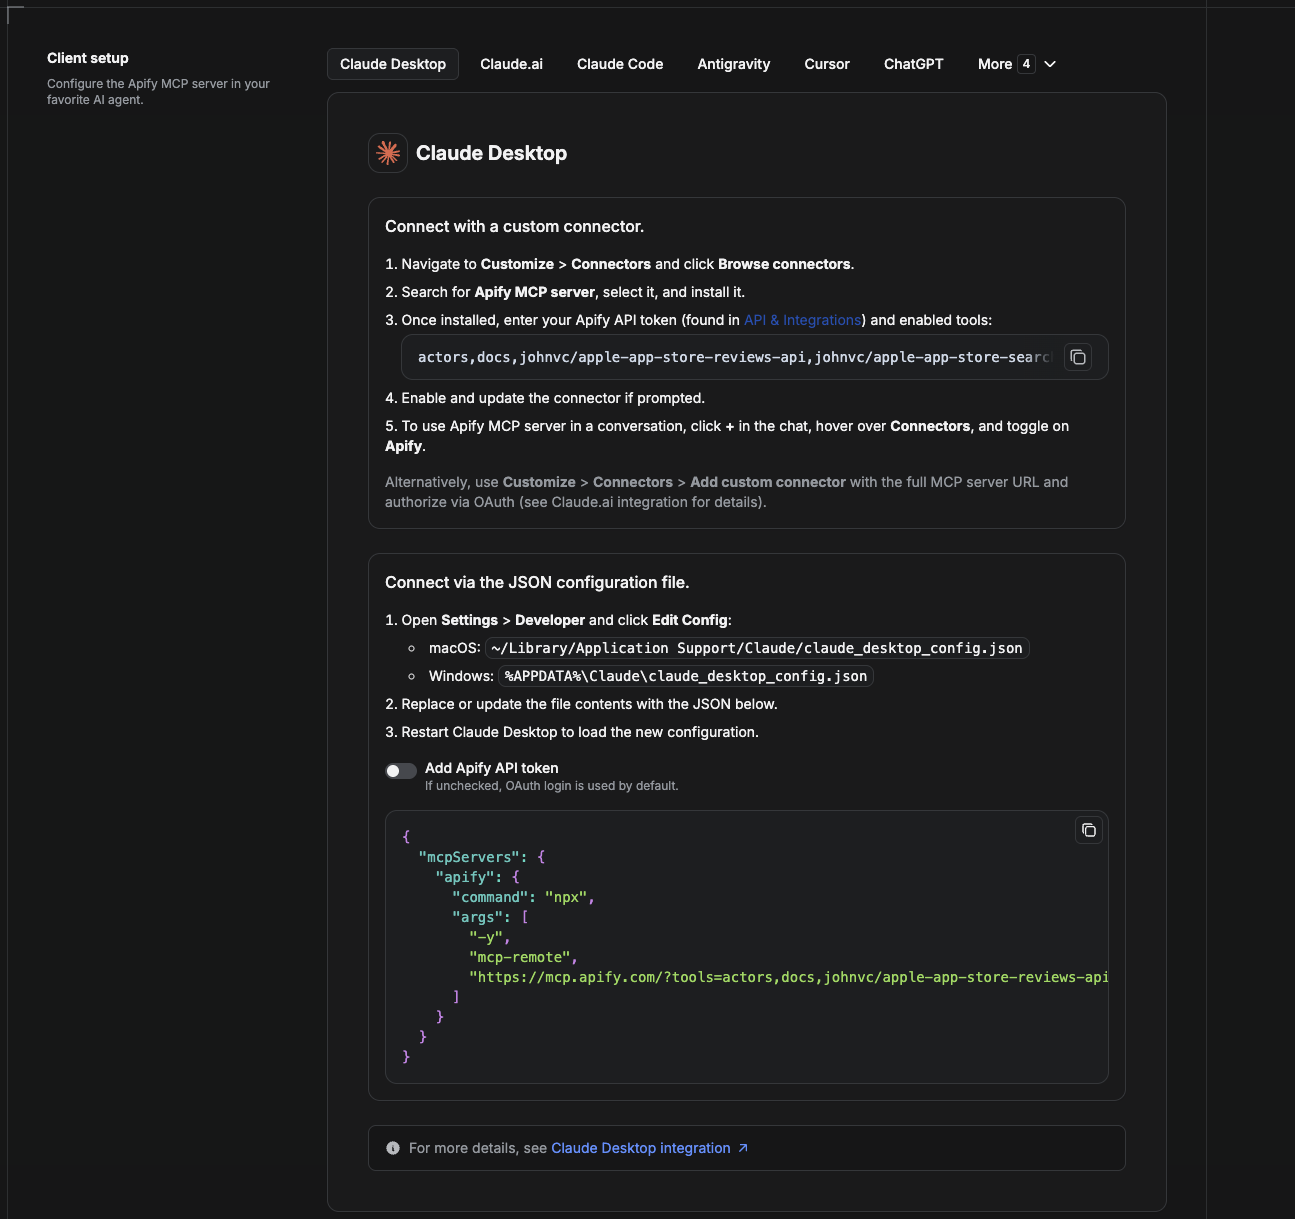
Cowork is the desktop app's automation mode. To give it the Apify Store API as a tool, add the Apify MCP server as a connector.
- Open the Claude desktop app and go to Settings → Connectors (or Settings → Developer → Edit Config to edit
claude_desktop_config.jsondirectly).- macOS:
~/Library/Application Support/Claude/claude_desktop_config.json - Windows:
%APPDATA%\Claude\claude_desktop_config.json
- macOS:
- Add the Apify MCP server, preloaded with only this Actor:
{
  "mcpServers": {
    "apify": {
      "command": "npx",
      "args": [
        "-y",
        "mcp-remote",
        "https://mcp.apify.com/?tools=actors,docs,johnvc/store-actor-intelligence-api"
      ]
    }
  }
}
- Restart the app. When Cowork first calls the tool, complete the OAuth prompt in your browser, or add your Apify API token in the connector settings to skip OAuth.
- In a Cowork chat, confirm the tool is available and ask it to run the Apify Store API.
Download the desktop app and start a free trial: https://claude.ai/referral/uIlpa7nPLg More help: https://docs.apify.com/platform/integrations/claude-desktop
Install in Claude Code
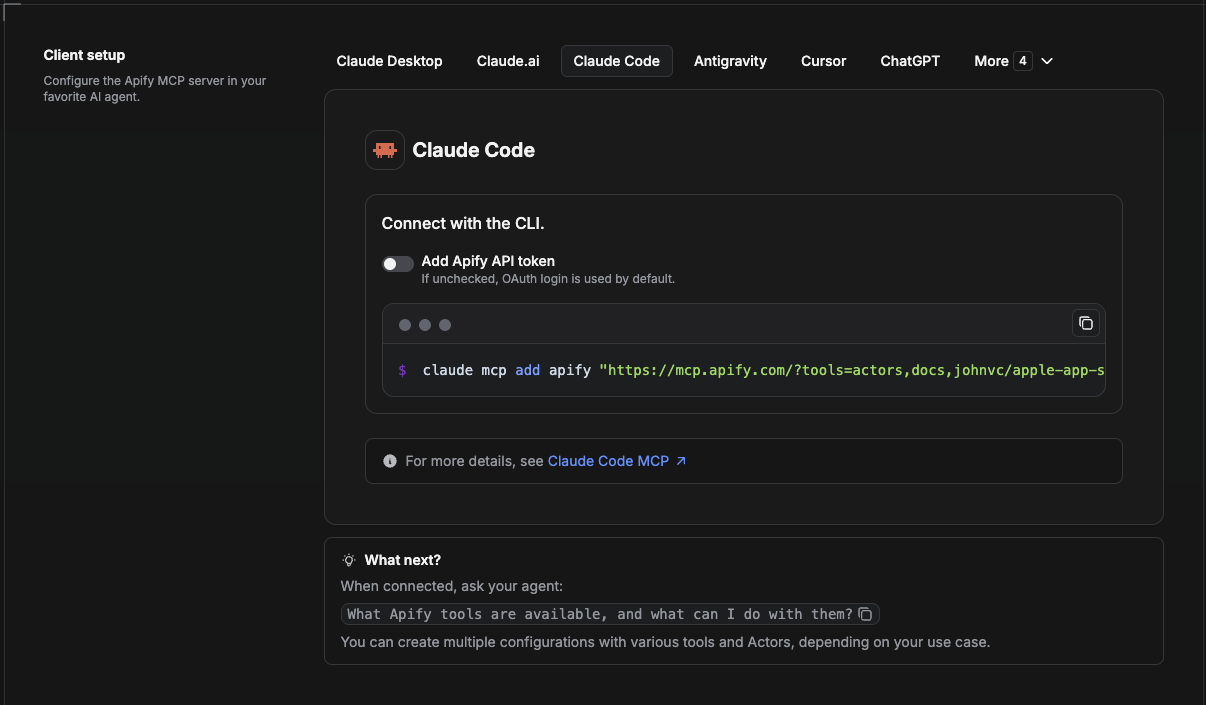
Claude Code is the command-line tool. Add the Actor's MCP server with one command:
claude mcp add --transport http apify \
  "https://mcp.apify.com/?tools=actors,docs,johnvc/store-actor-intelligence-api"
To use a token instead of browser OAuth:
claude mcp add --transport http apify \
  "https://mcp.apify.com/?tools=actors,docs,johnvc/store-actor-intelligence-api" \
  --header "Authorization: Bearer YOUR_APIFY_TOKEN"
Then verify with claude mcp list, or run /mcp inside a session. Ask Claude Code to call the Apify Store API.
Try Claude Code free: https://claude.ai/referral/uIlpa7nPLg Claude Code MCP docs: https://code.claude.com/docs/en/mcp
Install in Claude (website)
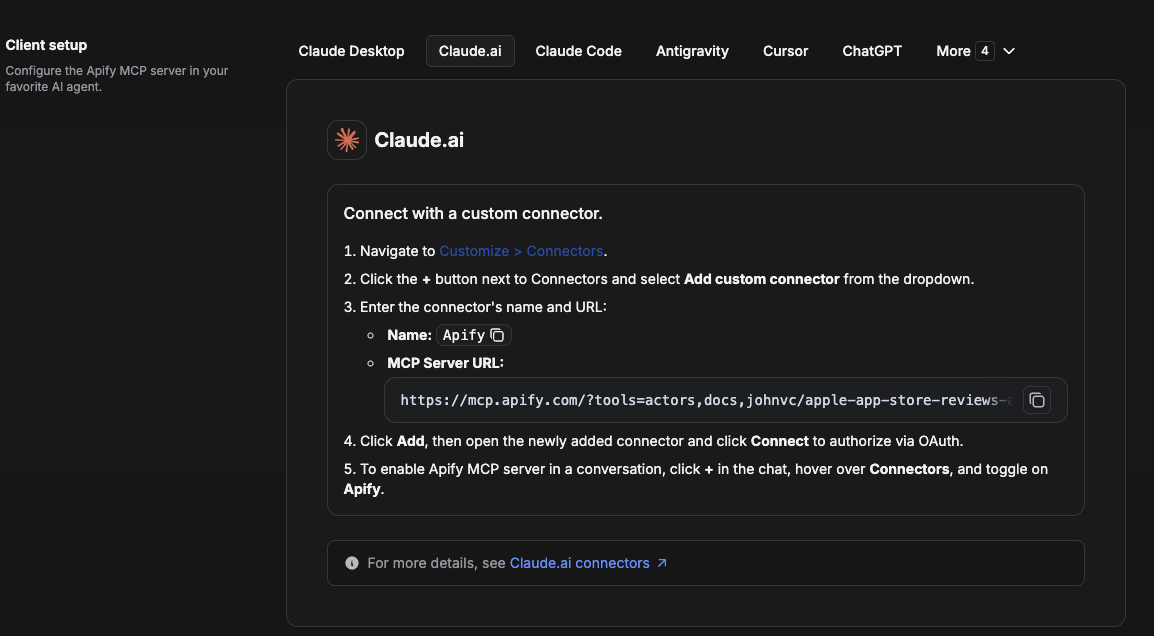
On claude.ai you add Apify as a connector, then enable just this Actor's tool.
- Go to Settings → Connectors → Browse connectors and search for Apify MCP server. Install it (enable or update if prompted).
- When connecting, authenticate with your Apify API token, and enable the tool
johnvc/store-actor-intelligence-api. - In any chat, open + → Connectors and turn on Apify.
- Alternatively, choose Add custom connector and paste the full MCP URL
https://mcp.apify.com/?tools=actors,docs,johnvc/store-actor-intelligence-api, using OAuth when prompted. - Ask Claude to run the Apify Store API.
Open Claude on the web: https://claude.ai
Install in Cursor
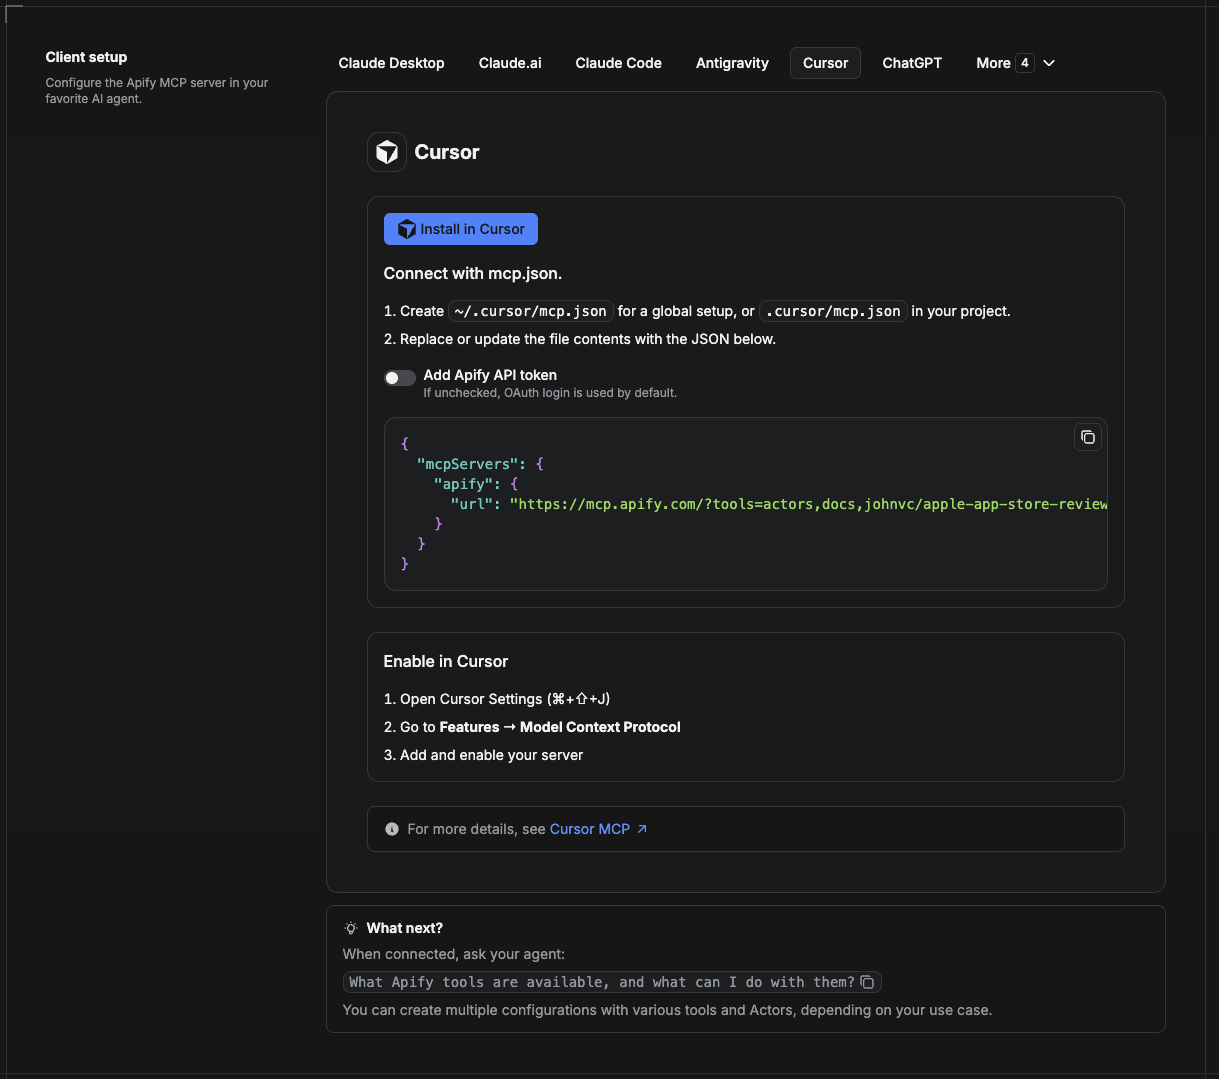
Cursor reads MCP servers from a project file at .cursor/mcp.json.
- In your project, create
.cursor/mcp.json:
{
  "mcpServers": {
    "apify": {
      "url": "https://mcp.apify.com/?tools=actors,docs,johnvc/store-actor-intelligence-api"
    }
  }
}
- If you prefer token auth over browser OAuth, add a header:
{
  "mcpServers": {
    "apify": {
      "url": "https://mcp.apify.com/?tools=actors,docs,johnvc/store-actor-intelligence-api",
      "headers": { "Authorization": "Bearer YOUR_APIFY_TOKEN" }
    }
  }
}
- Open Cursor → Settings → MCP and confirm the apify server is connected (green dot).
- In Composer or Chat, ask Cursor to call the Apify Store API.
New to Cursor? Get it here: https://cursor.com/referral?code=XQP4VBLI3NNX
Install in ChatGPT
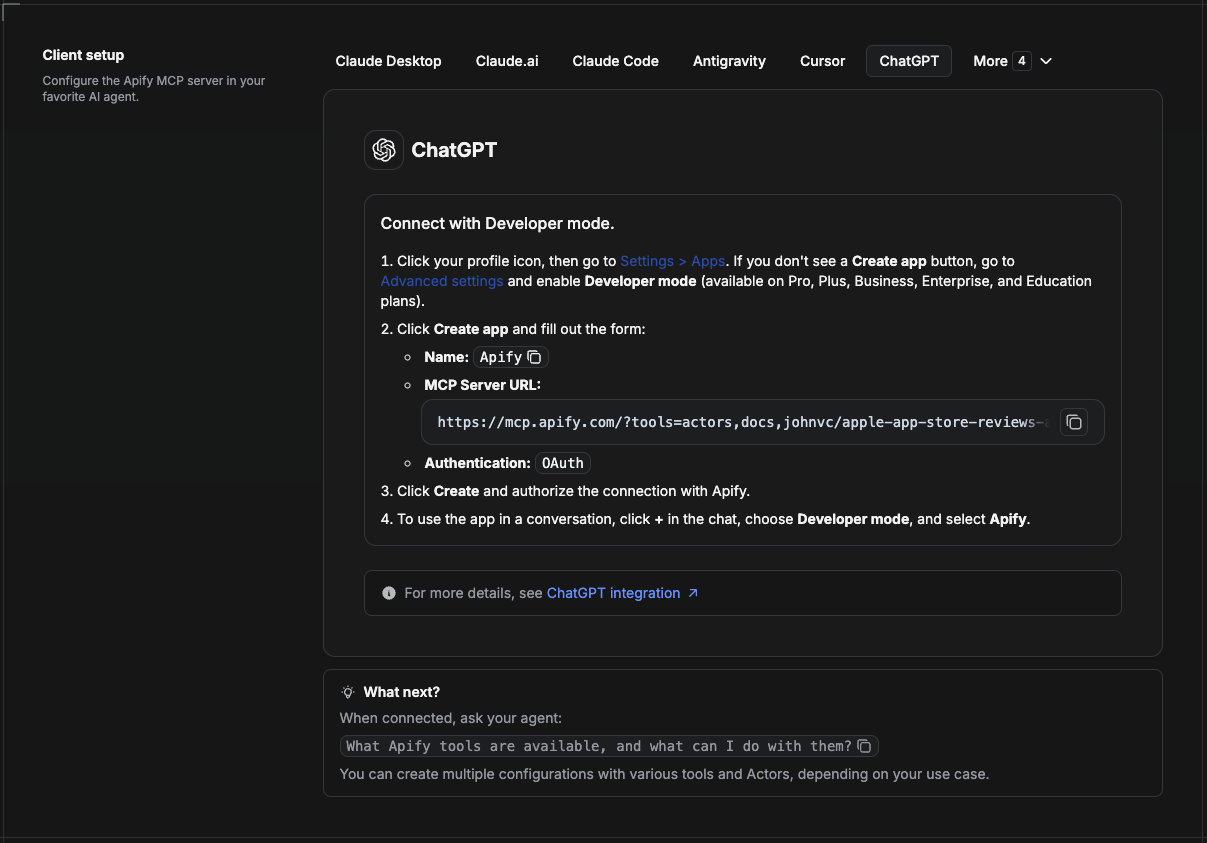
ChatGPT connects to the Apify MCP server through Developer mode (available on ChatGPT Pro, Plus, Business, Enterprise, and Education plans).
- Click your profile icon, then go to Settings > Apps. If you do not see a Create app button, open Advanced settings and enable Developer mode.
- Click Create app and fill out the form:
- Name: Apify
- MCP Server URL:
https://mcp.apify.com/?tools=actors,docs,johnvc/store-actor-intelligence-api - Authentication: OAuth
- Click Create and authorize the connection with Apify.
- To use the app in a conversation, click + in the chat, choose Developer mode, and select Apify.
More help: https://docs.apify.com/platform/integrations/mcp
Made with care by johnvc on Apify.
Last Updated: 2026.06.29
Установка Apify Store API Server
У этого сервера нет опубликованного пакета — он собирается из исходников. Открой репозиторий и следуй инструкции в README.
▸ github.com/johnisanerd/Apify-Store-APIFAQ
Apify Store API Server MCP бесплатный?
Да, Apify Store API Server MCP бесплатный — установка в пару кликов через Unyly без оплаты.
Нужен ли API-ключ для Apify Store API Server?
Нет, Apify Store API Server работает без API-ключей и переменных окружения.
Apify Store API Server — hosted или self-hosted?
Доступен hosted-вариант: Unyly запускает сервер в облаке, локальная установка не обязательна.
Как установить Apify Store API Server в Claude Desktop, Claude Code или Cursor?
Открой Apify Store API Server на unyly.org, выбери вкладку своего клиента (Claude Desktop, Claude Code, Cursor) и нажми Install — конфиг сгенерируется автоматически, без правки JSON.
Похожие MCP
Fetch
Web content fetching and conversion for efficient LLM usage.
AWS KB Retrieval
Retrieval from AWS Knowledge Base using Bedrock Agent Runtime.
 автор: modelcontextprotocol
Spring AI MCP Server
Provides auto-configuration for setting up an MCP server in Spring Boot applications.
llm-analysis-assistant
A very streamlined mcp client that supports calling and monitoring stdio/sse/streamableHttp, and can also view request responses through the /logs page. It also
 автор: xuzexin-hz
Compare Apify Store API Server with
Не уверен что выбрать?
Найди свой стек за 60 секунд
Автор?
Embed-бейдж для README
Похожее
Все в категории ai