
Azure AI Foundry Agent
БесплатноНе проверенEnables interaction with Azure AI Agent Service by automatically discovering agents and creating MCP tools for querying and managing agent workflows.

Описание
Enables interaction with Azure AI Agent Service by automatically discovering agents and creating MCP tools for querying and managing agent workflows.
README
This project provides an MCP (Model Context Protocol) server for integrating with Azure AI Agent Service. It is designed to help you interact with Azure-hosted AI agents, query them, and manage agent-related workflows in a secure and scalable way.
Features
- Automatic discovery and registration of all Azure AI Agents from your service
- Dynamically creates MCP tools for each agent in your Azure AI Agent Service
- Supports both local and web transport modes
- Regular background sync to detect new or changed agents
Project Structure
azure_agent_mcp_server/— Main server code and tools.env— Environment variables for configuration (see below)pyproject.toml— Project dependencies and metadatauv.lock— Lockfile for reproducible installs (managed by uv)
Notes
- The most recent version of the AI Foundry SDK requires an AI Foundry Project. It doesn't support a hub based project currently. For more information about Azure AI Foundry project types, see the official documentation.
Getting Started
1. Prerequisites
- Python 3.13+
- uv (recommended for dependency management)
- Azure AI Foundry project (no hub-based projects supported)
- You get the project endpoint from the Azure AI Foundry portal. It looks like this:
https://<your-ai-foundry-project-ressource>.services.ai.azure.com/api/projects/<your-ai-foundry-project-name> - You can find the project endpoint in the Azure AI Foundry portal under "Overview":
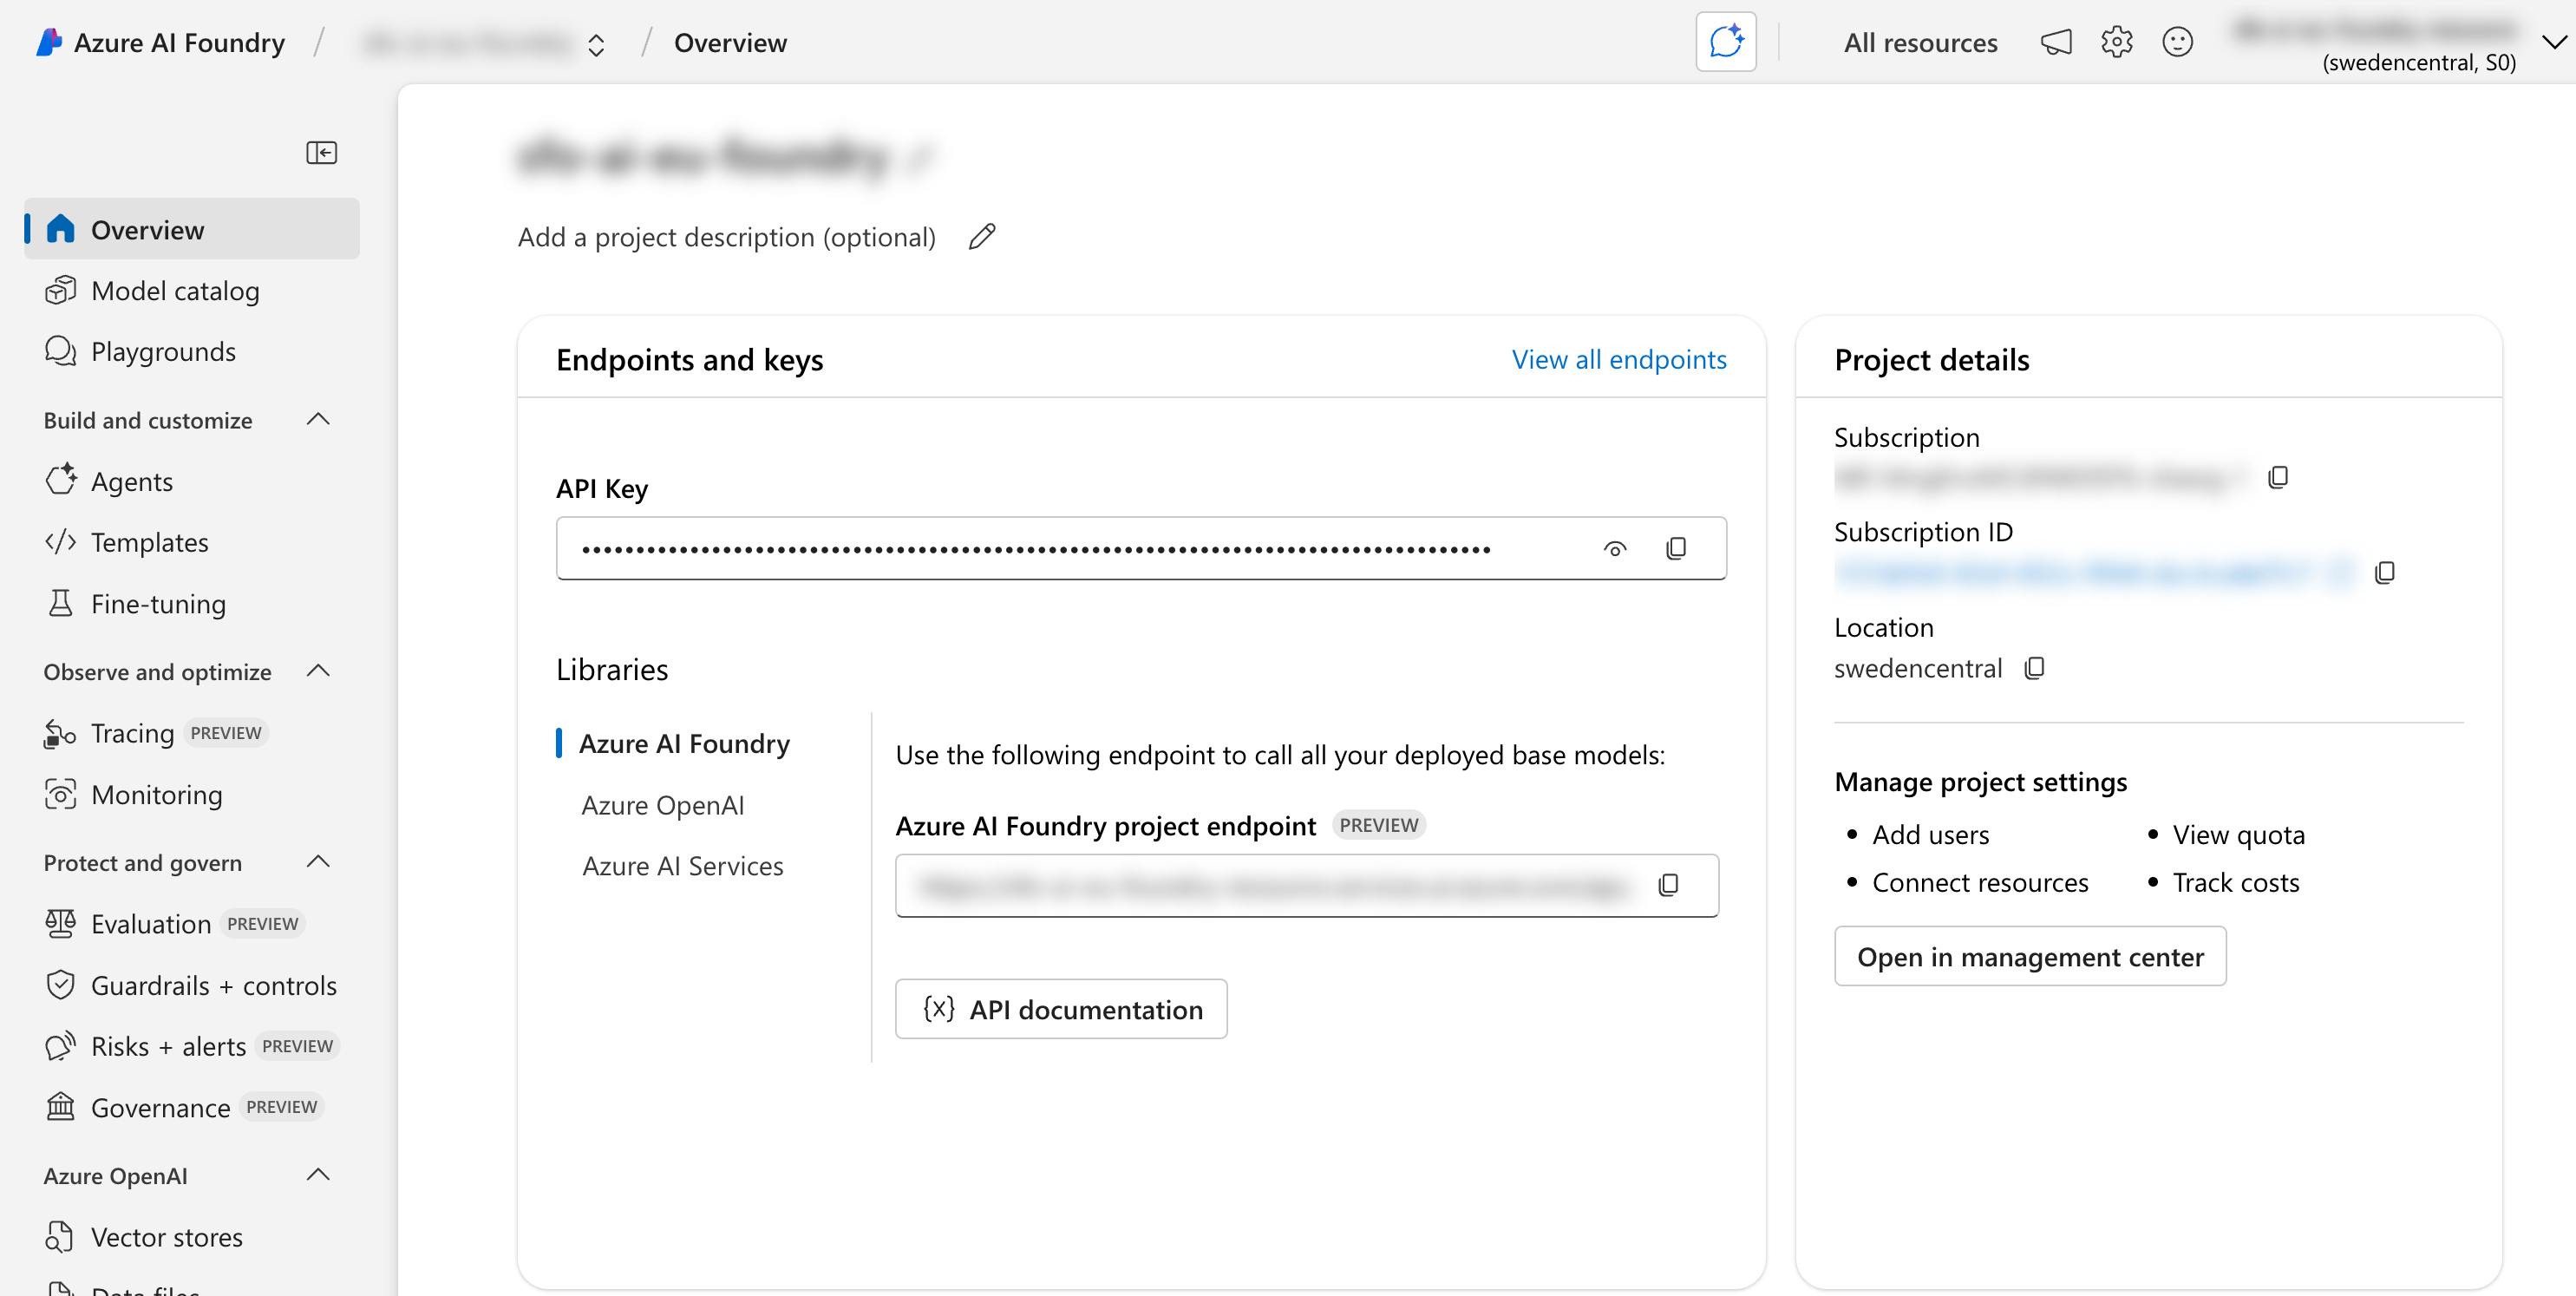
2. Setup
Clone the repository
Configure environment variables:
- Copy the provided
.envfile or create your own. Example:PROJECT_ENDPOINT=your-ai-foundry-project-endpoint - This variable is required for connecting to your Azure AI Agent Service.
- Copy the provided
Install dependencies:
- Using uv:
uv pip install -r pyproject.toml - Or, to sync with the lockfile:
uv sync - Alternatively, you can use
piporpipxif you prefer.
- Using uv:
3. Running the Server
The server can run in two modes:
Local mode (default):
uv run -m azure_agent_mcp_server
# Alternatively, you can run:
# python -m azure_agent_mcp_server
Web mode (accessible via HTTP):
# Set SERVER_TYPE=web in your .env file, or run with:
SERVER_TYPE=web uv run -m azure_agent_mcp_server
# Alteratively, you can run:
# SERVER_TYPE=web python -m azure_agent_mcp_server
When started, the server will:
- Connect to Azure AI Agent Service using the provided endpoint
- Automatically discover all your agents
- Create MCP tools for each agent
- Periodically check for new or updated agents every 300 seconds
4. Querying Agents in VSCode / GitHub Copilot
Add MCP Server to VSCode settings:
"mcp": {
     "servers": {
         "Azure AI Agents Server": {
             "command": "uv",
             "args": [
                 "--directory",
                 "/YOUR/PROJECT/PATH",
                 "run",
                 "-m",
                 "azure_agent_mcp_server"
             ],
             "env": {
                 "PROJECT_ENDPOINT": "your-ai-foundry-project-endpoint"
             }
         }
     }
 },
After the server starts, it automatically discovers all agents from your Azure AI Agent Service and makes them available as MCP tools with names based on the agent names (converted to snake_case).
You can then use these tools directly in GitHub Copilot or any other MCP-compatible client.
Good to know: Create a copilot-instructions.md file in the .github directory in your project to instruct copilot to streamline the usage of the MCP tools. For more information about repository custom instructions, see the GitHub documentation.
Environment Variables and Configuration
The MCP server can be configured using the following environment variables in your .env file:
PROJECT_ENDPOINT: Azure AI Foundry project endpoint (required)SERVER_TYPE: Set to "local" (default) or "web" to choose the transport modeSERVER_PORT: Port number for web mode (default: 8000)SERVER_PATH: Path for web mode (default: "/")UPDATE_INTERVAL: How often (in seconds) to check for new or updated agents (default: 300)LOG_LEVEL: Set the logging level (default: "WARNING"). Options include "DEBUG", "INFO", "WARNING", "ERROR", and "CRITICAL".
Example .env file:
PROJECT_ENDPOINT=your-ai-foundry-project-endpoint
SERVER_TYPE=web
SERVER_PORT=9000
UPDATE_INTERVAL=120
LOG_LEVEL=INFO
Note: Never commit secrets to version control.
About uv
uv is a fast, modern Python package and project manager. It replaces tools like pip, pip-tools, pipx, poetry, and virtualenv, and is recommended for reproducible, efficient dependency management in this project.
- See uv documentation for more details.
How Agent Tools Work
The system automatically:
- Connects to Azure AI Agent Service on startup
- Discovers all agents available in your service
- Creates an MCP tool for each agent, converting the agent name to snake_case for the function name
- Sets the tool description to match the agent description
- Periodically checks for new, updated, or deleted agents
- Updates the available tools accordingly
Example:
- An agent named "Coding Guidelines" becomes a tool named
coding_guidelines - An agent named "Python Expert" becomes a tool named
python_expert
License
This project is licensed under the MIT License. See the LICENSE file for details.
Установка Azure AI Foundry Agent
У этого сервера нет опубликованного пакета — он собирается из исходников. Открой репозиторий и следуй инструкции в README.
▸ github.com/sebafo/azure-ai-foundry-mcpFAQ
Azure AI Foundry Agent MCP бесплатный?
Да, Azure AI Foundry Agent MCP бесплатный — установка в пару кликов через Unyly без оплаты.
Нужен ли API-ключ для Azure AI Foundry Agent?
Нет, Azure AI Foundry Agent работает без API-ключей и переменных окружения.
Azure AI Foundry Agent — hosted или self-hosted?
Доступен hosted-вариант: Unyly запускает сервер в облаке, локальная установка не обязательна.
Как установить Azure AI Foundry Agent в Claude Desktop, Claude Code или Cursor?
Открой Azure AI Foundry Agent на unyly.org, выбери вкладку своего клиента (Claude Desktop, Claude Code, Cursor) и нажми Install — конфиг сгенерируется автоматически, без правки JSON.
Похожие MCP
Fetch
Web content fetching and conversion for efficient LLM usage.
AWS KB Retrieval
Retrieval from AWS Knowledge Base using Bedrock Agent Runtime.
 автор: modelcontextprotocol
Spring AI MCP Server
Provides auto-configuration for setting up an MCP server in Spring Boot applications.
llm-analysis-assistant
A very streamlined mcp client that supports calling and monitoring stdio/sse/streamableHttp, and can also view request responses through the /logs page. It also
 автор: xuzexin-hz
Compare Azure AI Foundry Agent with
Не уверен что выбрать?
Найди свой стек за 60 секунд
Автор?
Embed-бейдж для README
Похожее
Все в категории ai