
Owui Mcp Spawner
FreeNot checkedSpawn OpenWebUI-compatible tool JSONs as isolated Model Context Protocol (MCP) servers — each in its own virtualenv. Upload or write a tool, dependencies instal

About
Spawn OpenWebUI-compatible tool JSONs as isolated Model Context Protocol (MCP) servers — each in its own virtualenv. Upload or write a tool, dependencies install automatically, and it's served over Streamable HTTP for OpenWebUI, Claude Code, or any MCP client.
README
OWUI MCP Spawner turns Python tools and OpenWebUI tool exports into standalone Model Context Protocol servers. A web dashboard handles installation, configuration, start/stop, logs and test calls. Clients connect using MCP over Streamable HTTP.
Two central parts of the framework make it more than a collection of individual MCP servers:
- MCP Control Tool: let an agent manage the framework itself — create tools, configure instances, control processes and inspect logs.
- MCP Tool Router: give a client one connection for discovering and calling the tools across your running instances, with schemas loaded on demand.
Quick navigation: Installation · First tool · Client connection · Security · Documentation
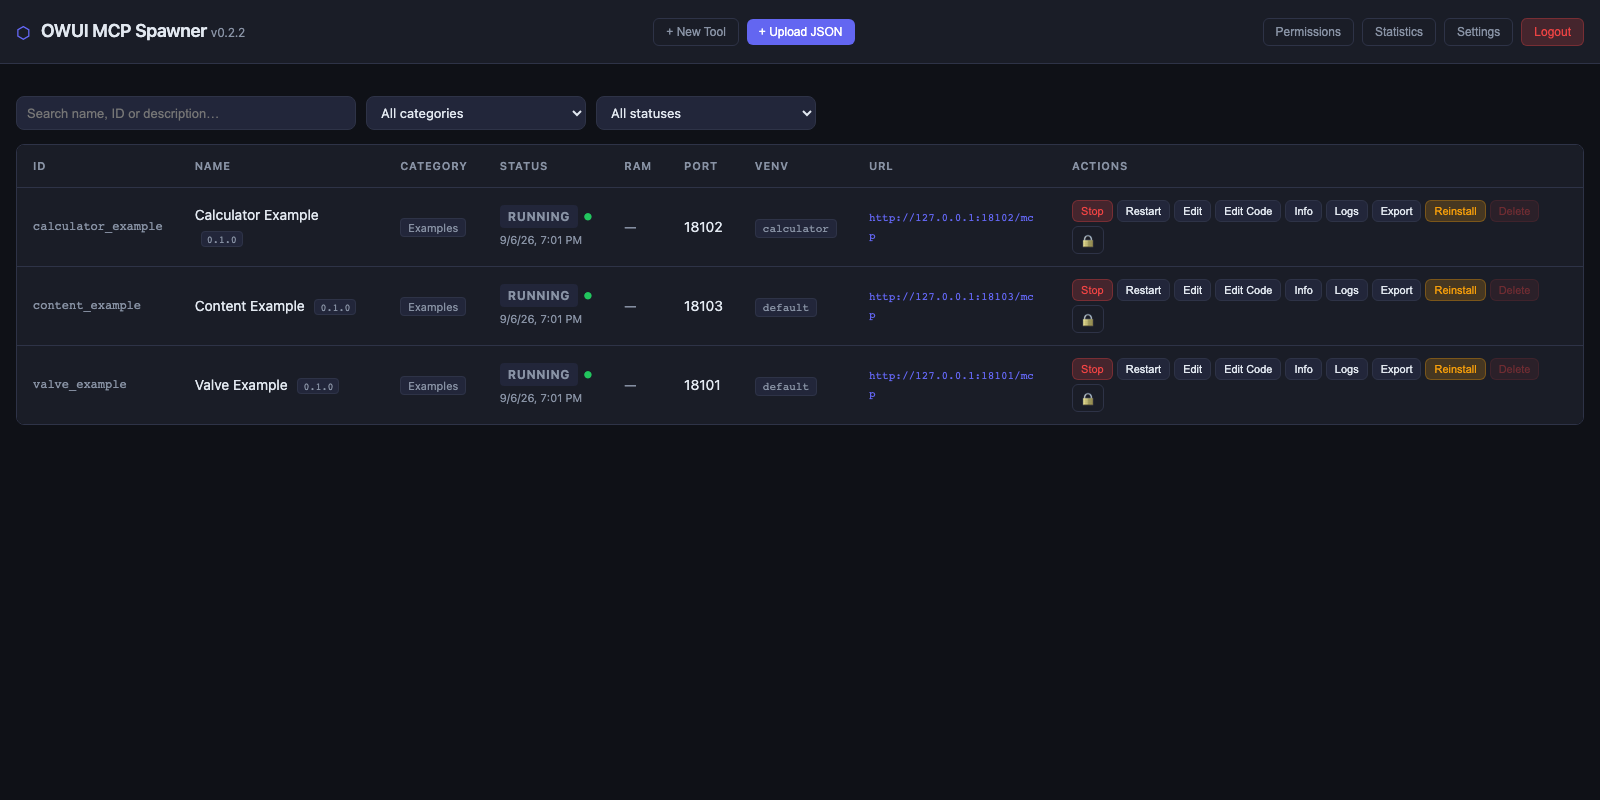
Fresh installation with optional Calculator, Valve and Content examples. These tools need no accounts, API keys or external services. They are not installed automatically.
Install and start locally
The commands below use Python 3.11+ on macOS or Linux, Git and an internet connection for package installation. The package metadata permits Python 3.10; the repository's full test suite requires 3.11+.
git clone https://github.com/torfeu/owui-mcp-spawner.git
cd owui-mcp-spawner
python3.11 -m venv .venv
.venv/bin/python -m pip install -e .
.venv/bin/python app/manager.py
Open http://127.0.0.1:7860 in a browser. Leave the terminal running; use Ctrl+C to stop the manager. If port 7860 is occupied, add --port 17860 and open that port instead.
The editable install uses the dependency list in pyproject.toml, including psutil for the system monitor and the required MCP SDK version. Keep the checkout in place because the application also uses its web/ and examples/ directories.
A fresh checkout starts with no instances. configs/example.json is a template and is not loaded as an installed tool. OpenHAB, OpenWebUI and an LLM are not required to install the spawner or try the examples below.
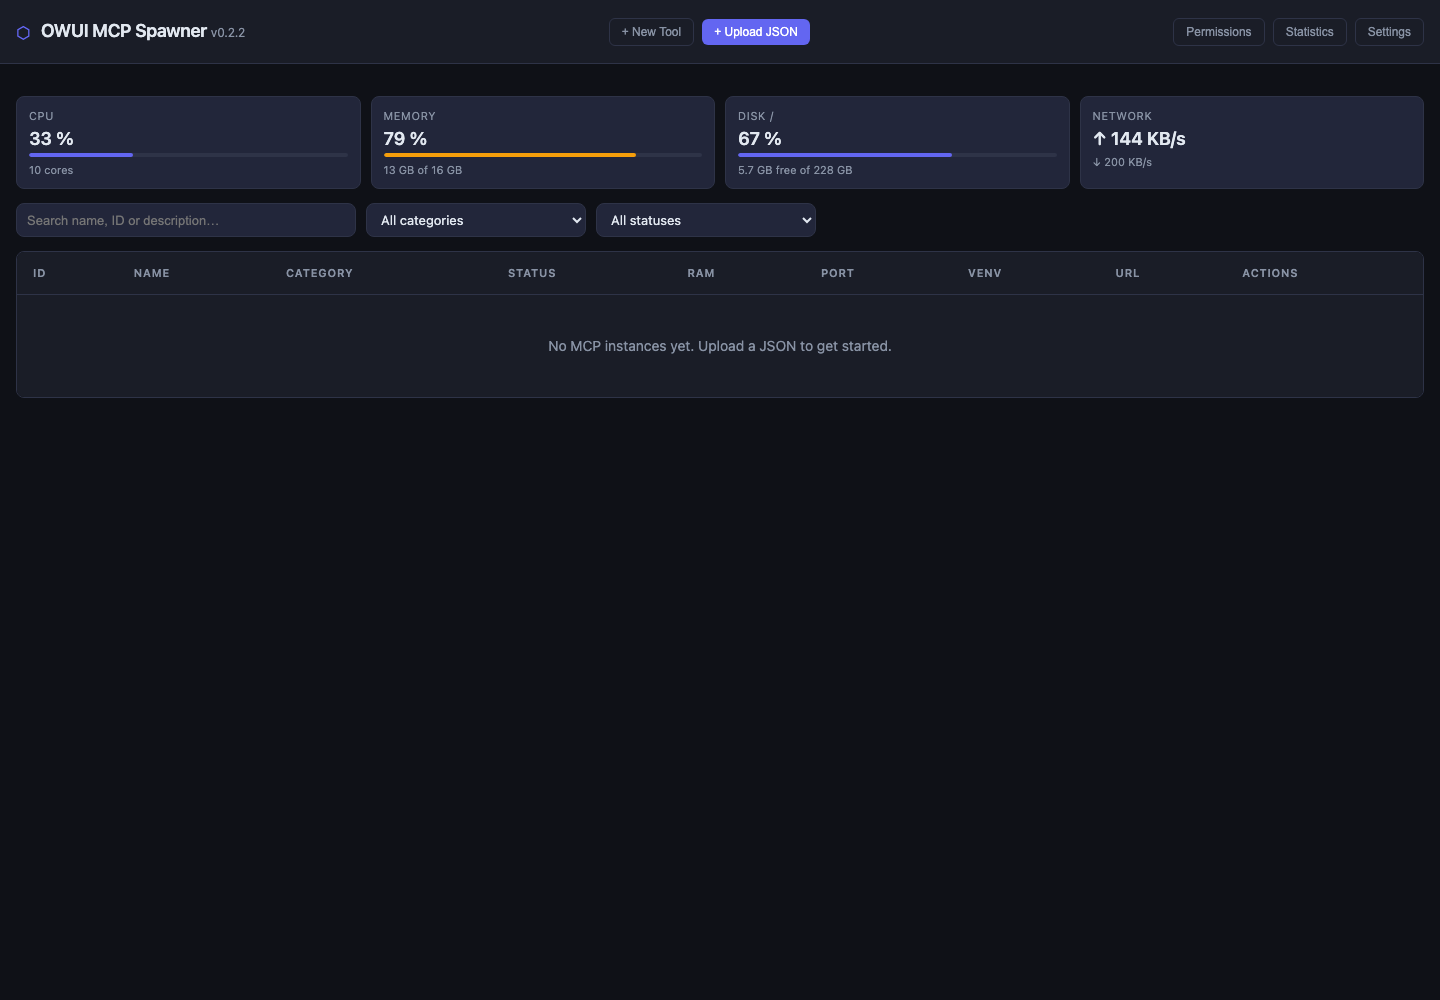
The default bind address is localhost. Without a configured password, local access has full administration rights. See Network access and authentication before making it reachable from another machine.
Install your first tool
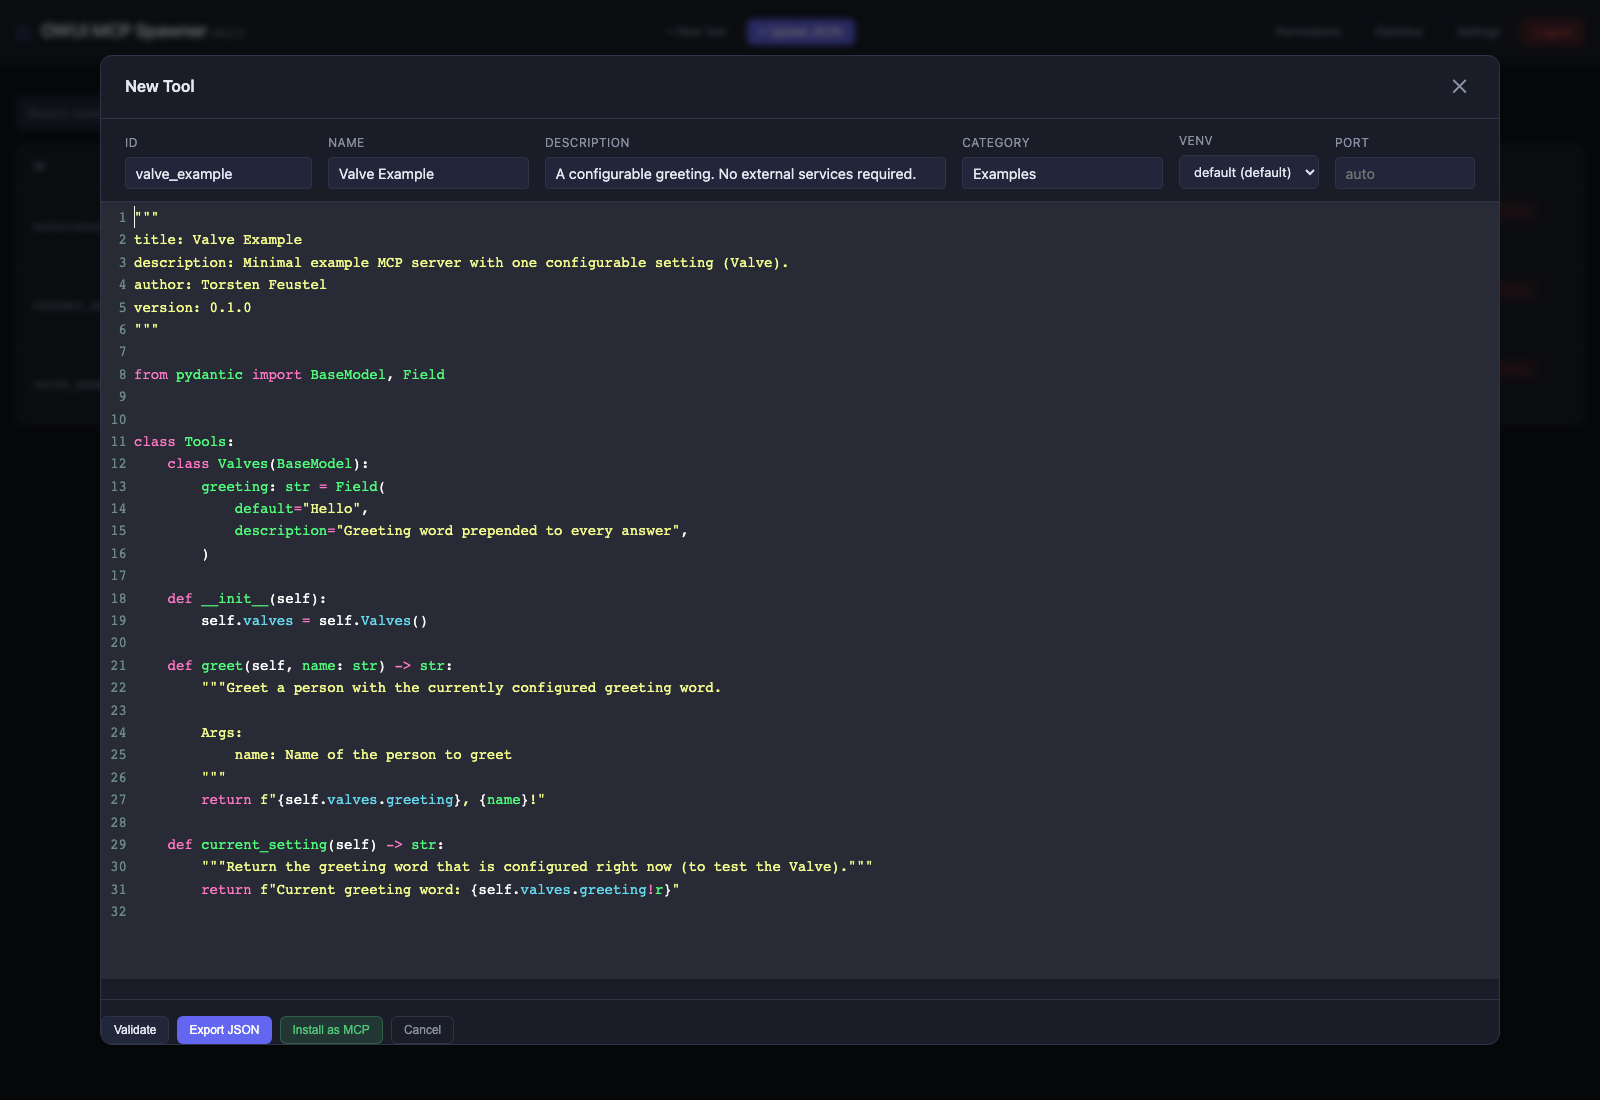
- Click + New Tool.
- Replace the starter code with examples/example_valve_tool.py.
- Set ID to
valve_example, Name toValve Exampleand Category toExamples. - Keep the
defaultenvironment and leave the port empty for automatic allocation. - Click Install as MCP. The first installation creates the runner environment and installs its base packages; this may take a few minutes.
- Click Start on the new instance.
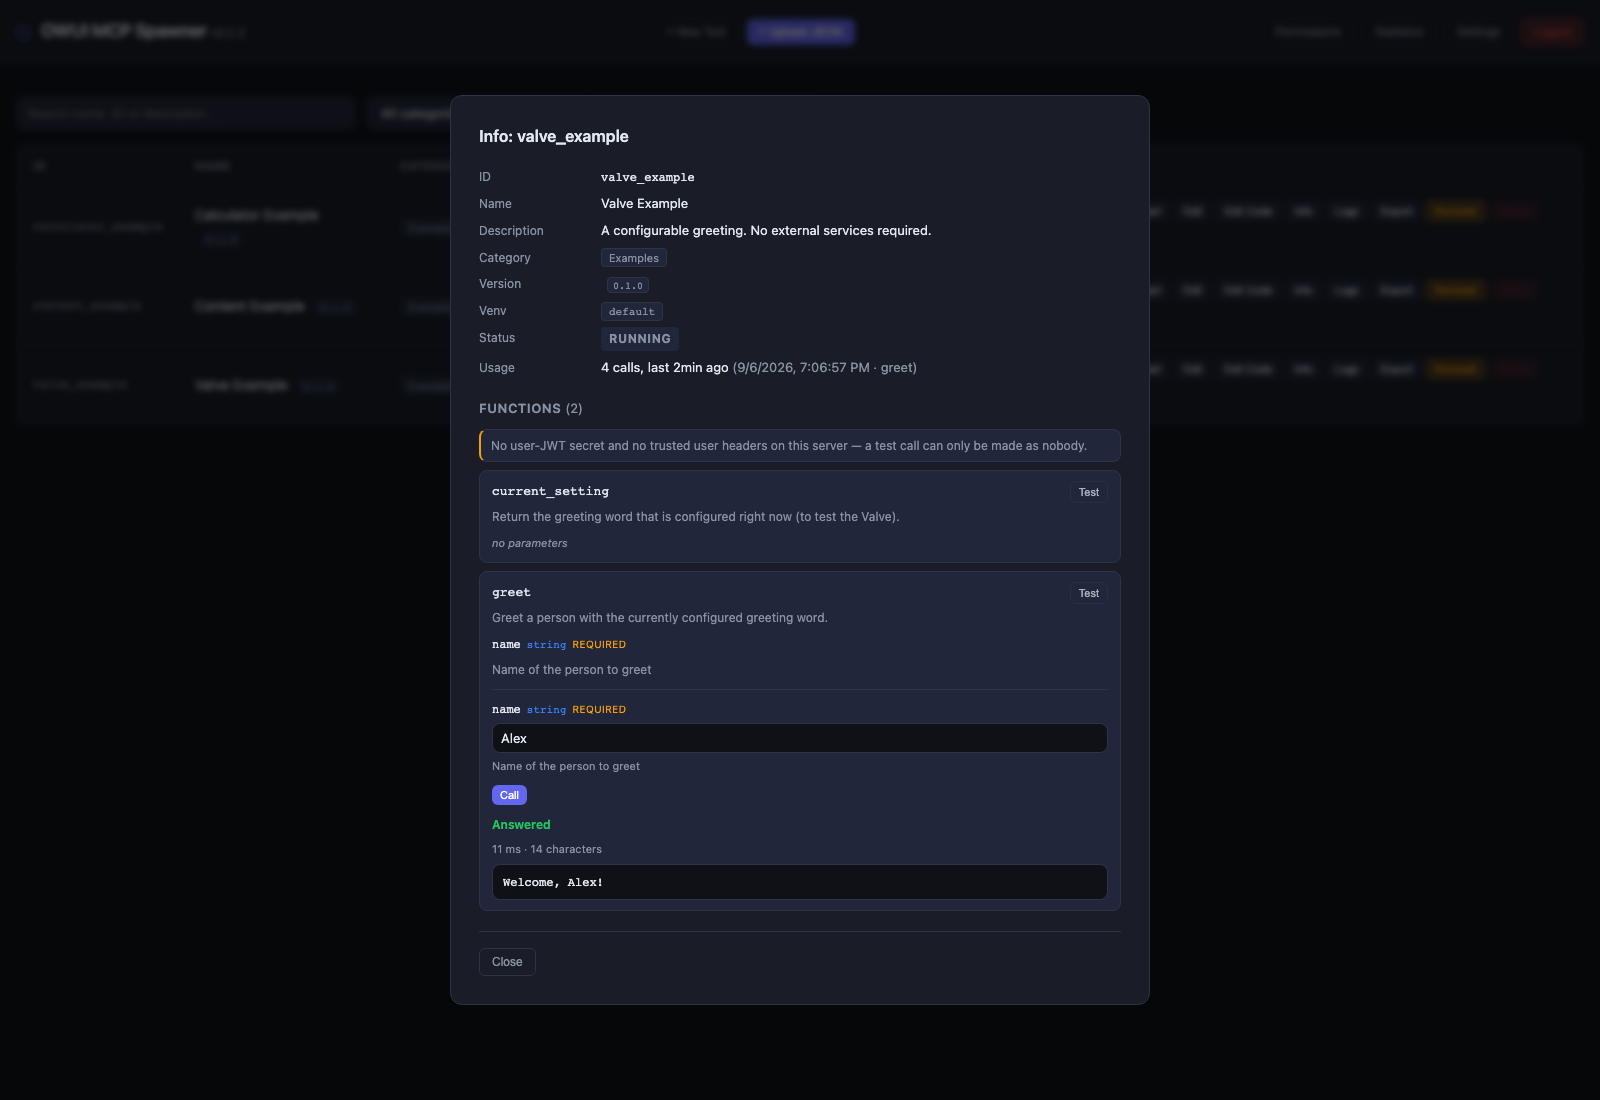
- Open Info, expand Test for
greet, enterAlexand click Call. The result should beHello, Alex!.
Each instance runs in a separate process. Its packages live in a named virtual environment: instances share default unless you choose another name. Use separate environments for tools with incompatible dependencies. A virtual environment is package isolation, not a security sandbox for untrusted Python.
Change greeting under Edit → Values, save, then repeat the call. With the default restart_on_change setting, a running instance restarts to apply the value. The screenshot below uses Welcome.
Python source goes into + New Tool; OpenWebUI JSON exports go through + Upload JSON. Installing creates the instance; starting it is a separate action. Only install code you trust: validation and tool calls execute its Python code.
Examples you can run without external services
| Example source | Suggested ID | Try it |
|---|---|---|
| Calculator | calculator_example |
add(a=7, b=5) → 12; multiply(a=6, b=7) → 42 |
| Configurable greeting | valve_example |
greet(name="Alex"); change the greeting Valve |
| File creation | content_example |
Enable File storage in Edit, then call write_note(title="First MCP note", text="Hello from MCP") |
Install each Python example through + New Tool. For the calculator screenshot we chose a named environment, calculator, to demonstrate package separation; default also works for all three examples.
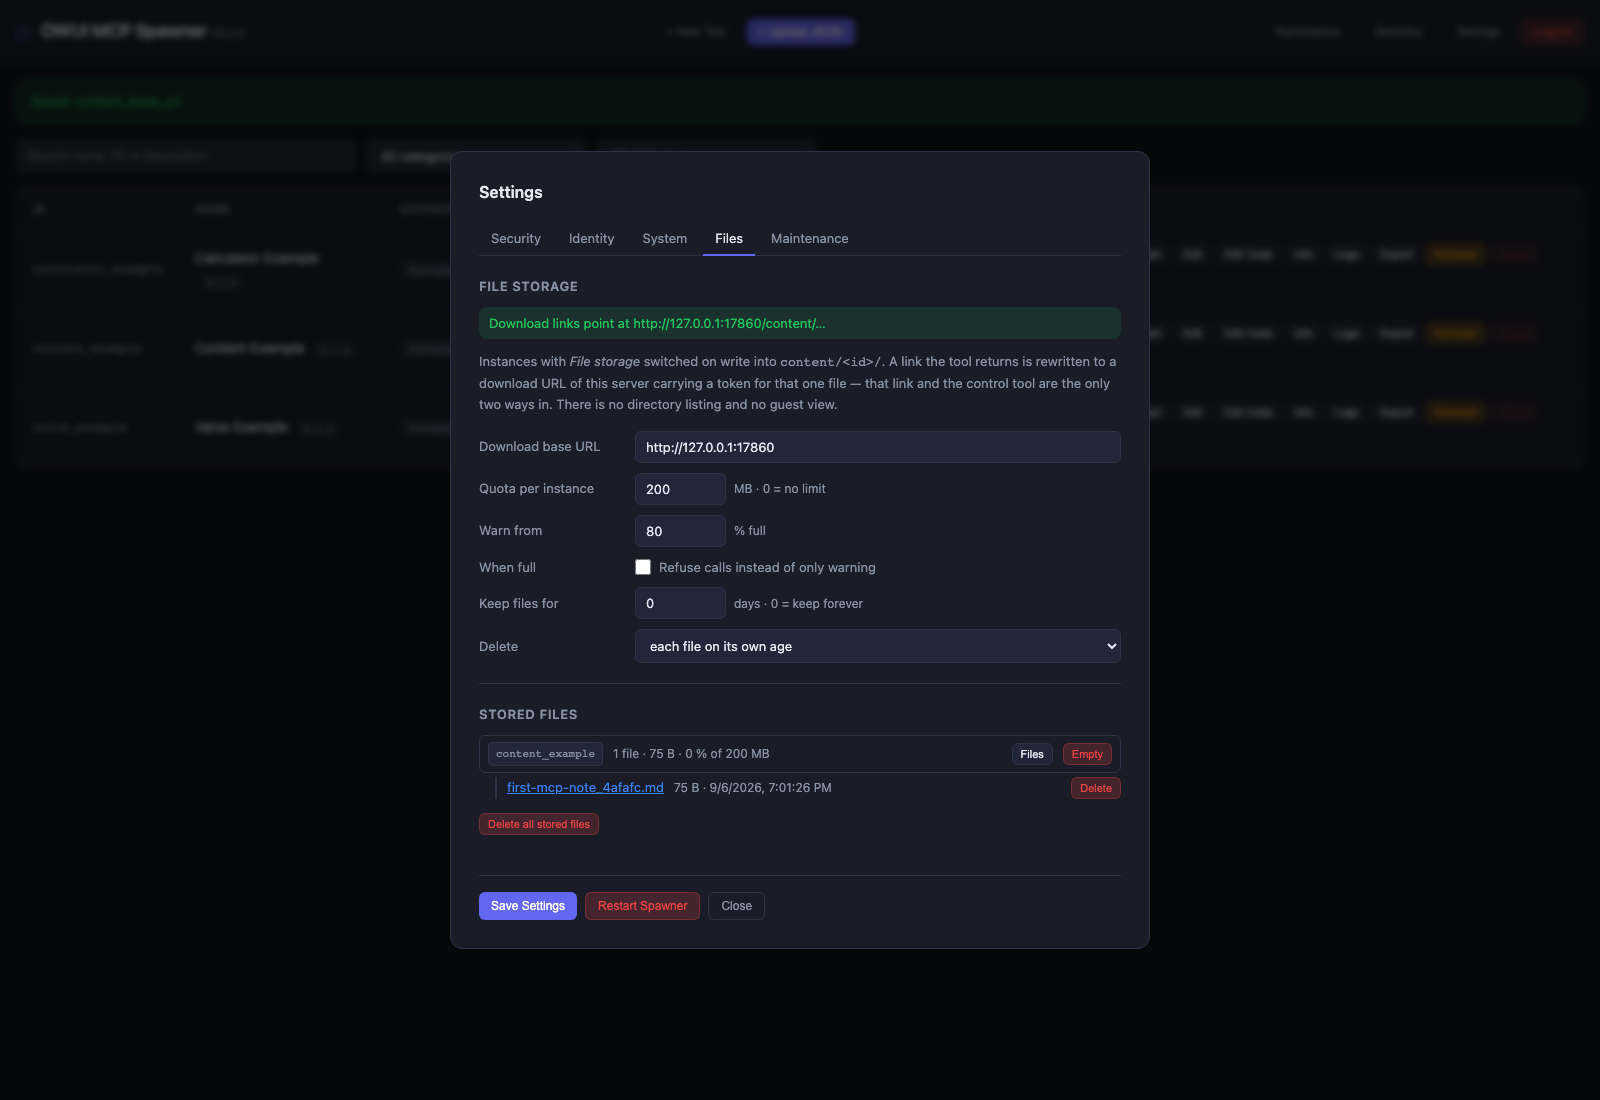
The content example stores files in content/<instance-id>/. Under Settings → Files, set Download base URL to the manager address your client can reach (for a local demo, http://127.0.0.1:7860). This makes links usable from a chat client as well as the dashboard. The same tab lists files for download. It is local framework storage; any storage integration is optional tool code, not part of the installation.
The shipped Identity Probe is an optional JSON tool for diagnosing caller identity.
Connect an MCP client
Copy the running instance's URL from the dashboard. With the default listener setup it has this shape:
http://127.0.0.1:<instance-port>/mcp
Add it to your client's MCP server configuration using Streamable HTTP. The manager dashboard on port 7860 and an instance's MCP endpoint are different addresses. The port assigned to your instance is shown in the table; screenshot ports are only examples.
Use Export for an OpenWebUI connection entry. If the client runs in a container or on another machine, 127.0.0.1 refers to that container or machine: use a reachable spawner address and configure authentication first.
For multiple tools you can optionally enable instance endpoints, category endpoints or install the tool router. These are separate choices and are not prerequisites for a fresh installation.
Managing the spawner over MCP (control tool)
The MCP Control Tool lets an agent operate the framework through MCP. It exposes 33 functions, covering the same everyday workflow as the dashboard: inspect instances, create and edit tools, install dependencies, start processes, diagnose failures and manage generated files.
| Area | Functions and capabilities |
|---|---|
| Instances and processes | List and inspect instances; start, stop, restart and reinstall; read install and runtime logs |
| Tool development | Get a template, validate Python, create or upload a tool, read and save code, export tool JSON |
| Configuration | Change categories, Valve values, lifecycle settings, dependencies and named environments |
| Diagnostics | Read tool schemas, settings, usage and system statistics; list agent identities; check a backup |
| Maintenance | List/read stored files; explicitly enable instance deletion, file deletion or manager restart when needed |
Set up the control tool
- Use + Upload JSON with examples/mcp-manager-control.json. Its instance ID is
mcp_manager_control. - Open Edit → Values. Set
manager_urlto the manager's address as reachable from the control instance, normallyhttp://127.0.0.1:7860. Use the actual manager port if you changed it. - Set
auth_tokento a manager agent token for management tasks, or a read token for read-only use. Configure these in Settings → Security; see API tokens. - Review the
allow_*Valves and save. Most actions, including code changes and start/stop, are enabled by default. Onlyallow_delete,allow_manager_restartandallow_content_deletedefault tofalse. Turn off actions the agent should not use. - Start the instance and copy its MCP URL from the dashboard into your client. If MCP authentication is enabled, the client also needs the MCP Bearer token.
The auth_token authorizes the control tool's calls to the manager API; the client's MCP token authorizes access to the control instance. API token permissions and the framework's --no-edit / --no-code-edit settings still apply in addition to the Valves.
For example, ask your agent to list instances, inspect a failed installation log, or create a calculator tool from the framework template. create_tool installs a new instance; start_instance starts it as a separate step. A code-editing agent can use get_tool_code, validate_tool_code and save_tool_code to inspect and update an existing tool.
See the complete control-tool function list and permissions.
One connection for all tools (MCP tool router)
The MCP Tool Router gives your client one MCP connection across the running tool instances. The model initially sees just three meta-tools. It discovers a function, loads that function's parameter schema and then calls it. This reduces the schemas included up front; the actual context savings depend on the installed tools and client.
| Meta-tool | Purpose |
|---|---|
find_tools(query_words, category, mode) |
Discover available functions by keyword or category. Without filters, list the allowed running catalog up to max_results (default: 60). |
describe_tools(tools=["instance.action"]) |
Load the complete parameter schemas for the selected function handles. |
call_tool(tool="instance.action", arguments={...}) |
Invoke a selected function through MCP and return its result. |
Set up the router
- Use + Upload JSON with examples/mcp-tool-router.json. Its instance ID is
mcp_tool_router. - In Edit → Values, set
manager_urlto the manager's reachable address, normallyhttp://127.0.0.1:7860. - For a protected manager, set
auth_tokento a manager read token so the router can fetch the catalog. If the target MCP endpoints require authentication, setmcp_tokento their MCP Bearer token. These credentials have different purposes. - Keep or adjust
deny_instances(default:mcp_manager_control). Optionally restrict discovery and calls using the comma-separatedallow_categorieslist. - Save and start the router. Add its MCP URL to your client, supplying the MCP Bearer token if required. For the routed tools, use the router connection instead of also registering every instance directly; duplicate connections would still expose their schemas up front.
After installing and starting the calculator example above, the tool-call sequence is:
find_tools(query_words=["calculator"])
describe_tools(tools=["calculator_example.add"])
call_tool(tool="calculator_example.add", arguments={"a": 7, "b": 5})
# Result: 12
These are MCP tool calls for the client, not shell commands. Copy handles from find_tools and use the schema returned by describe_tools for the arguments. Searching discovers functions; searching inside a tool's data requires that tool's own search function.
The router supports both individual instance ports and shared MCP endpoints. It reads endpoint addresses from the manager catalog; mcp_base_url is an optional override for a different network setup. With caller identity enabled, it can forward identity to the target, which enforces its own permissions; see identity forwarding.
The router can invoke tools that write data. Its manager API access is read-only, but that does not make the routed tool calls read-only. The default exclusion of mcp_manager_control is enforced for both discovery and calls. Connect the control tool separately when you want an agent to administer the framework; use the router for access to your application tools.
Network access and authentication
The manager password protects administration; the MCP Bearer token protects tool endpoints. Setting one does not automatically configure the other.
For a local setup that will later be accessed over the network:
While still bound to localhost, open Settings → Security.
Set a unique manager password and an MCP Bearer token, then save. Keep the credentials for the dashboard and client respectively.
Stop the manager and restart it with the required bind address:
.venv/bin/python app/manager.py --host 0.0.0.0Use a reachable host address in the client and supply the MCP token. Use HTTPS through a reverse proxy or a trusted private connection when traffic leaves the local machine.
Settings survive restarts. CLI flags can override saved settings. For unattended startup, MCP_MANAGER_PASSWORD or MCP_MANAGER_PASSWORD_HASH can provide the manager credential; with app/manager.py, configure the MCP token through Settings or --mcp-token.
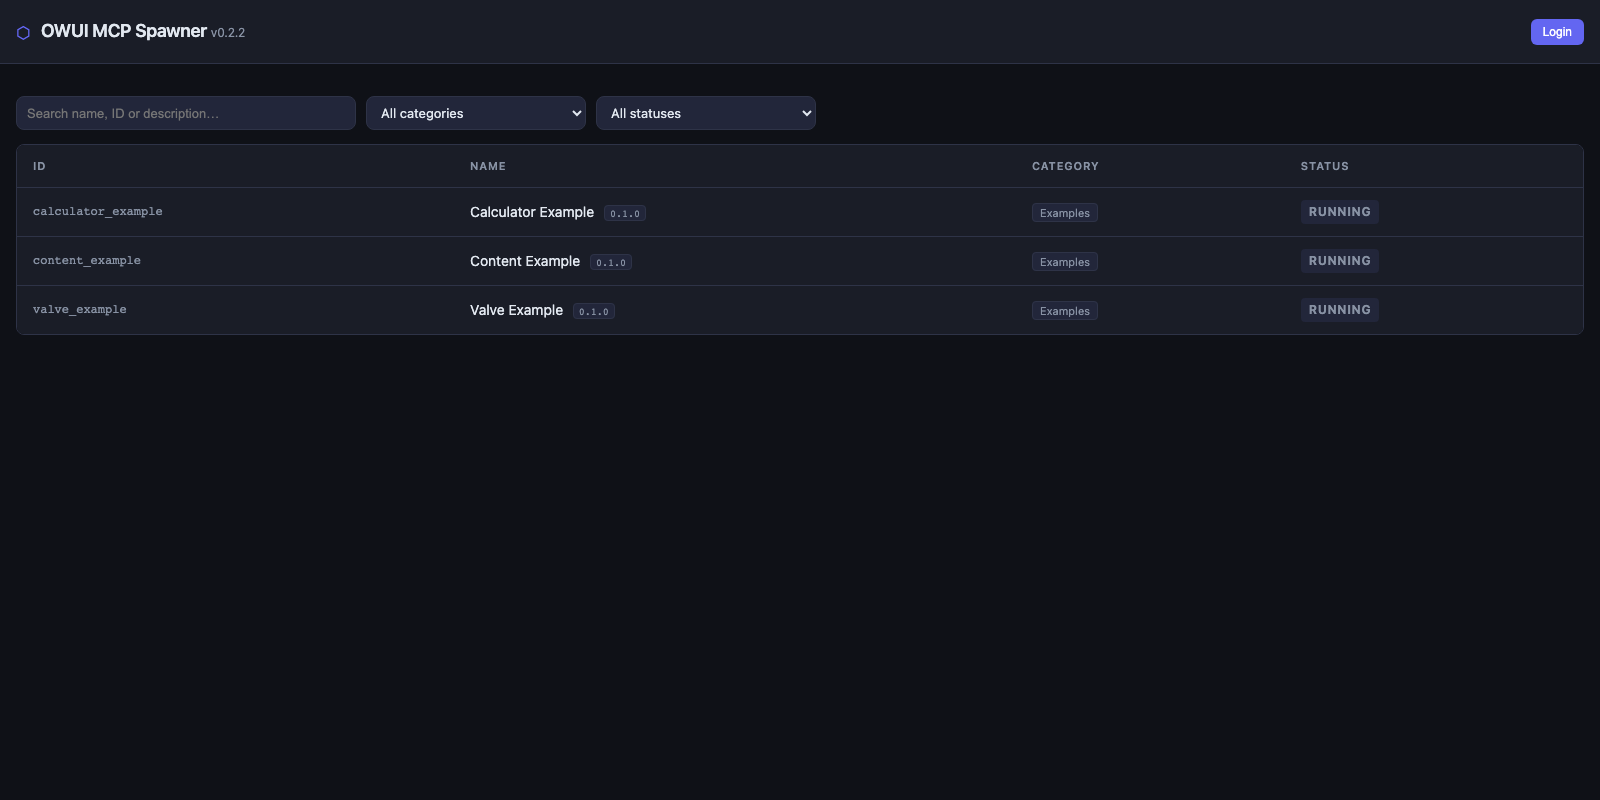
A password-protected manager opens in guest mode when no login is saved, showing a reduced instance list without addresses or administration controls. Use Login to authenticate; its dialog also offers Continue as guest.
For API read/agent tokens, per-user rules, named agent identities and edit modes, see the authentication reference. These features are optional; caller identity defaults to off for a new instance.
Operations and further documentation
| Topic | Documentation |
|---|---|
| Dashboard, logs, health checks, statistics and test calls | Dashboard reference |
| Named environments and dependency management | Virtual environments |
| Local files, download links, quotas and retention | File storage |
| Backup and restore | Backup and restore |
| Identity and permissions | Per-user identity |
| API routes | API reference |
| Writing tools and JSON import format | Tool development |
| Optional Linux service | systemd setup, service template |
| Updating an existing installation | Upgrade guide |
| Changes between versions | Changelog |
The working state is in configs/, tools/, runtime/ and, for generated files, content/. Do not copy these directories from someone else's deployment when you want an empty installation. A framework backup includes configurations and tool code, but runner environments and stored content require separate consideration; see the backup reference.
Configuration and code changes to the same instance are serialized. A second request arriving during an installation or save receives 409; retry after the first operation finishes. This does not remove any edit functionality.
Tests and screenshot provenance
Run tests in a disposable checkout, not in an active deployment:
.venv/bin/python -m unittest discover -s tests -v
See tests/README.md for coverage, isolation requirements and integration-test prerequisites. Some tests require local ports and a prepared runner environment. The fresh-installation run did not finish fully green; the report below records which sweeps errored and why.
The screenshots above were captured from a separate installation with newly created manager and runner environments. Only the example tools shown were added; no production configuration, credentials or private service integrations were copied. See the fresh-installation test report for the exact checks and results.
Credits and license
The web editor uses CodeMirror, licensed under MIT. OWUI MCP Spawner is distributed under the MIT license.
Installing Owui Mcp Spawner
This server has no published package — it is built from source. Open the repository and follow its README.
▸ github.com/torfeu/owui-mcp-spawnerFAQ
Is Owui Mcp Spawner MCP free?
Yes, Owui Mcp Spawner MCP is free — one-click install via Unyly at no cost.
Does Owui Mcp Spawner need an API key?
No, Owui Mcp Spawner runs without API keys or environment variables.
Is Owui Mcp Spawner hosted or self-hosted?
Self-hosted: the server runs locally on your machine via the install command above.
How do I install Owui Mcp Spawner in Claude Desktop, Claude Code or Cursor?
Open Owui Mcp Spawner on unyly.org, pick your client tab (Claude Desktop, Claude Code, Cursor) and press Install — the config is generated automatically, no JSON editing.
Related MCPs
GitHub
PRs, issues, code search, CI status
 by GitHub
Filesystem
Secure file operations with configurable access controls.
Memory
Knowledge graph-based persistent memory system.
Template MCP Server
A CLI tool to create a new Model Context Protocol server project with TypeScript support, dual transport options, and an extensible structure
 by mcpdotdirect
Amap Maps Mcp Server
MCP server for using the AMap Maps API
 by duxiaohui
Supabase
Database, auth and storage
 by Supabase
Everything
Reference / test server with prompts, resources, and tools.
Git
Tools to read, search, and manipulate Git repositories.
Sequential Thinking
Dynamic and reflective problem-solving through thought sequences.
Time
Time and timezone conversion capabilities.
Compare Owui Mcp Spawner with
Not sure what to pick?
Find your stack in 60 seconds
Author?
Embed badge for your README
Browse similar
All development MCPs