
Ros2 Web Portal
FreeNot checkedEnables natural language command control of robots via ROS2, with a web portal for real-time visualization and interaction.

About
Enables natural language command control of robots via ROS2, with a web portal for real-time visualization and interaction.
README
Overview



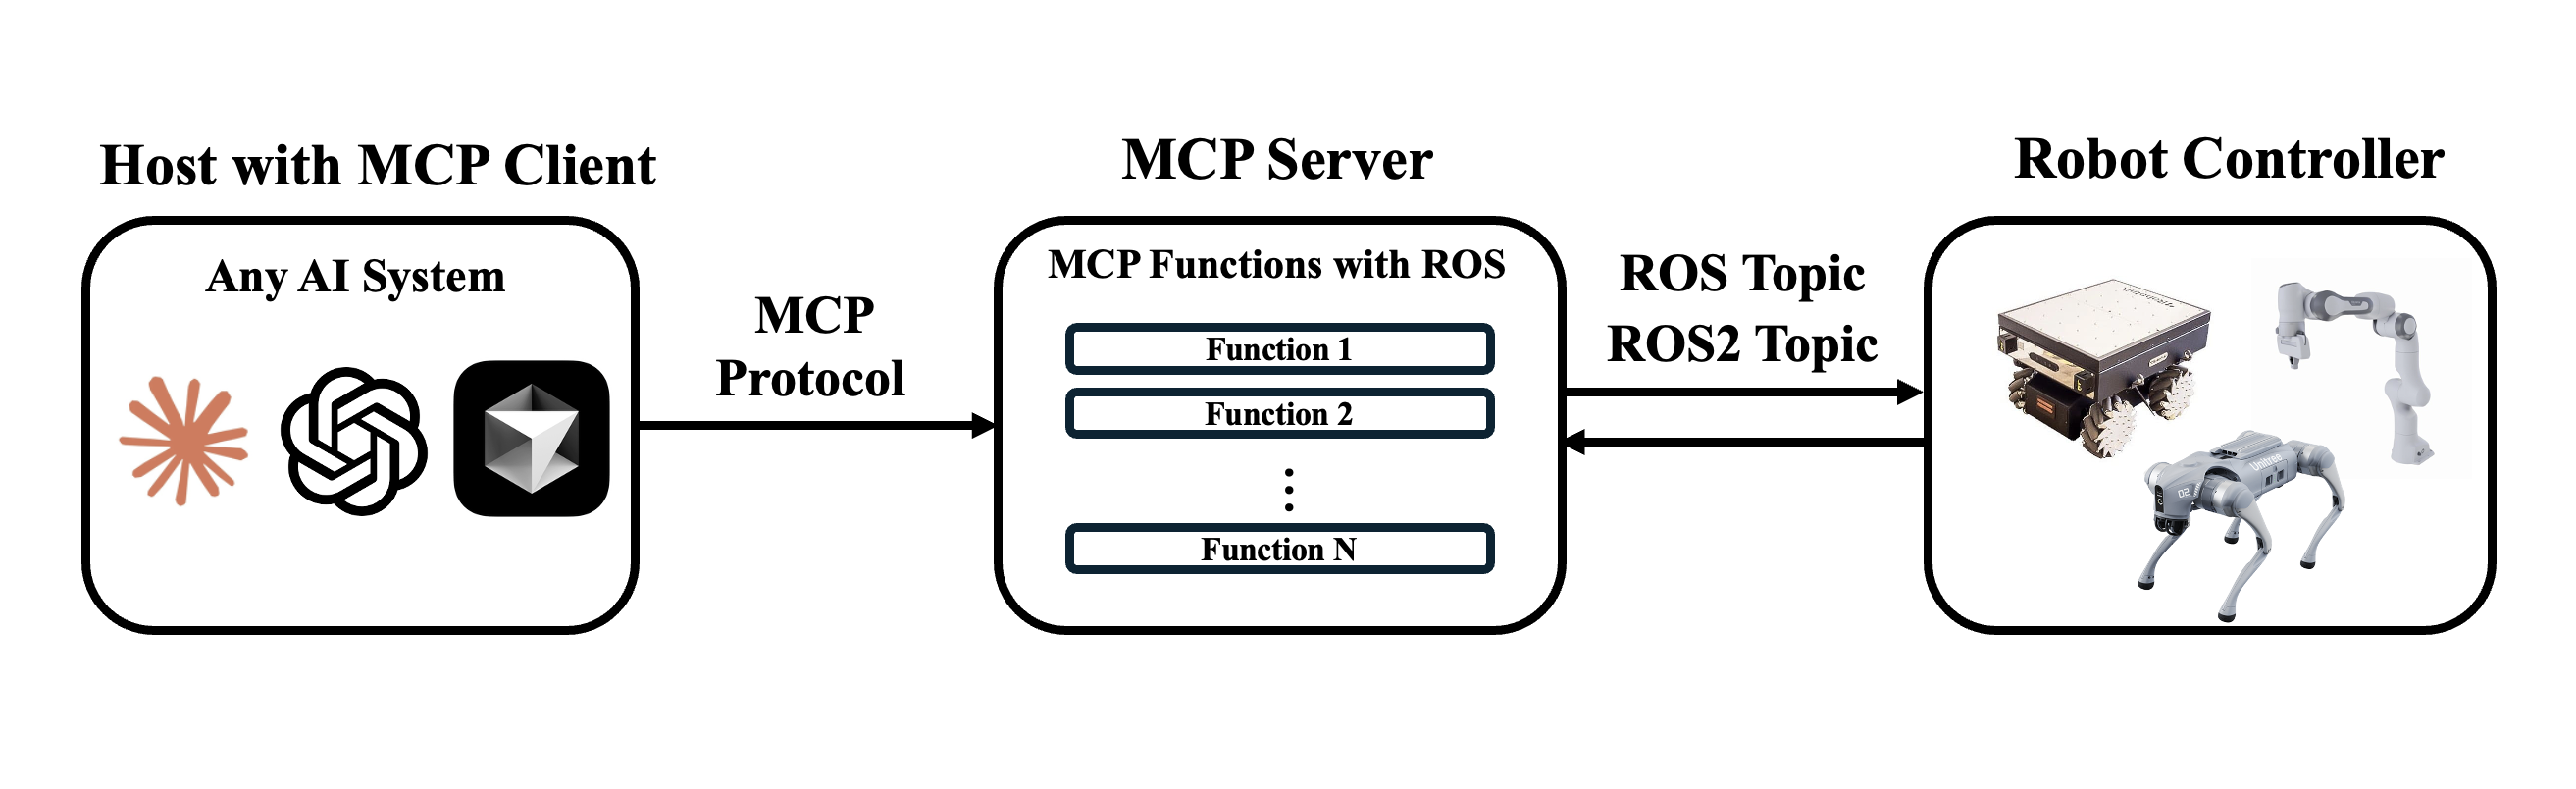
The ROS MCP Server with Web Portal is designed to support robots in performing complex tasks and adapting effectively to various environments by providing a set of functions that transform natural language commands, entered by a user through an LLM, into ROS commands for robot control. Furthermore, by utilizing rosbridge, it is configured to operate with both ROS and ROS2 systems, and its WebSocket-based communication enables broad applicability across diverse platforms. not only that using this MCP Server I have created a web portal that makes it super easy to go through hundreds of topics and services without typing a single command and visualzie it for easy intuition, see live camera stream wth description from LLM and ability to control robots with Web-UI.
Demo

Supported Environment
- Quadruped Simulation (successful testing on Isaac-sim+IsaacLab)
- Real Quadruped (under development)
- Humanoid Simulation + Real (In future)
1. MCP-Server Installation
uv Installation
- To install
uv, you can use the following command:
curl -LsSf https://astral.sh/uv/install.sh | sh
or
pip install uv
- Create virtual environment and activate it (Optional)
uv venv
source .venv/bin/activate
MCP Server Configuration
Option A. Install Cursor
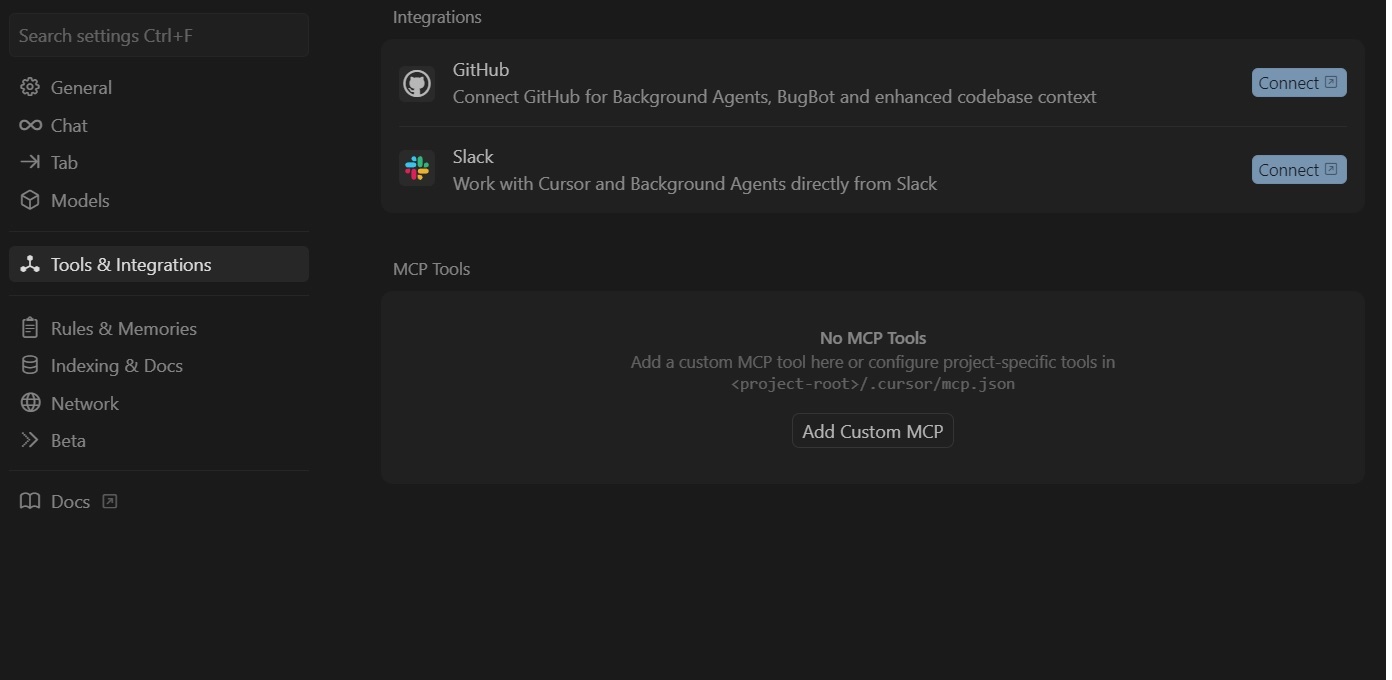
In cursor open settings and go to Tools & Integrations and then click Add Custom MCP. Then paste the code in section 2.1
Option B:
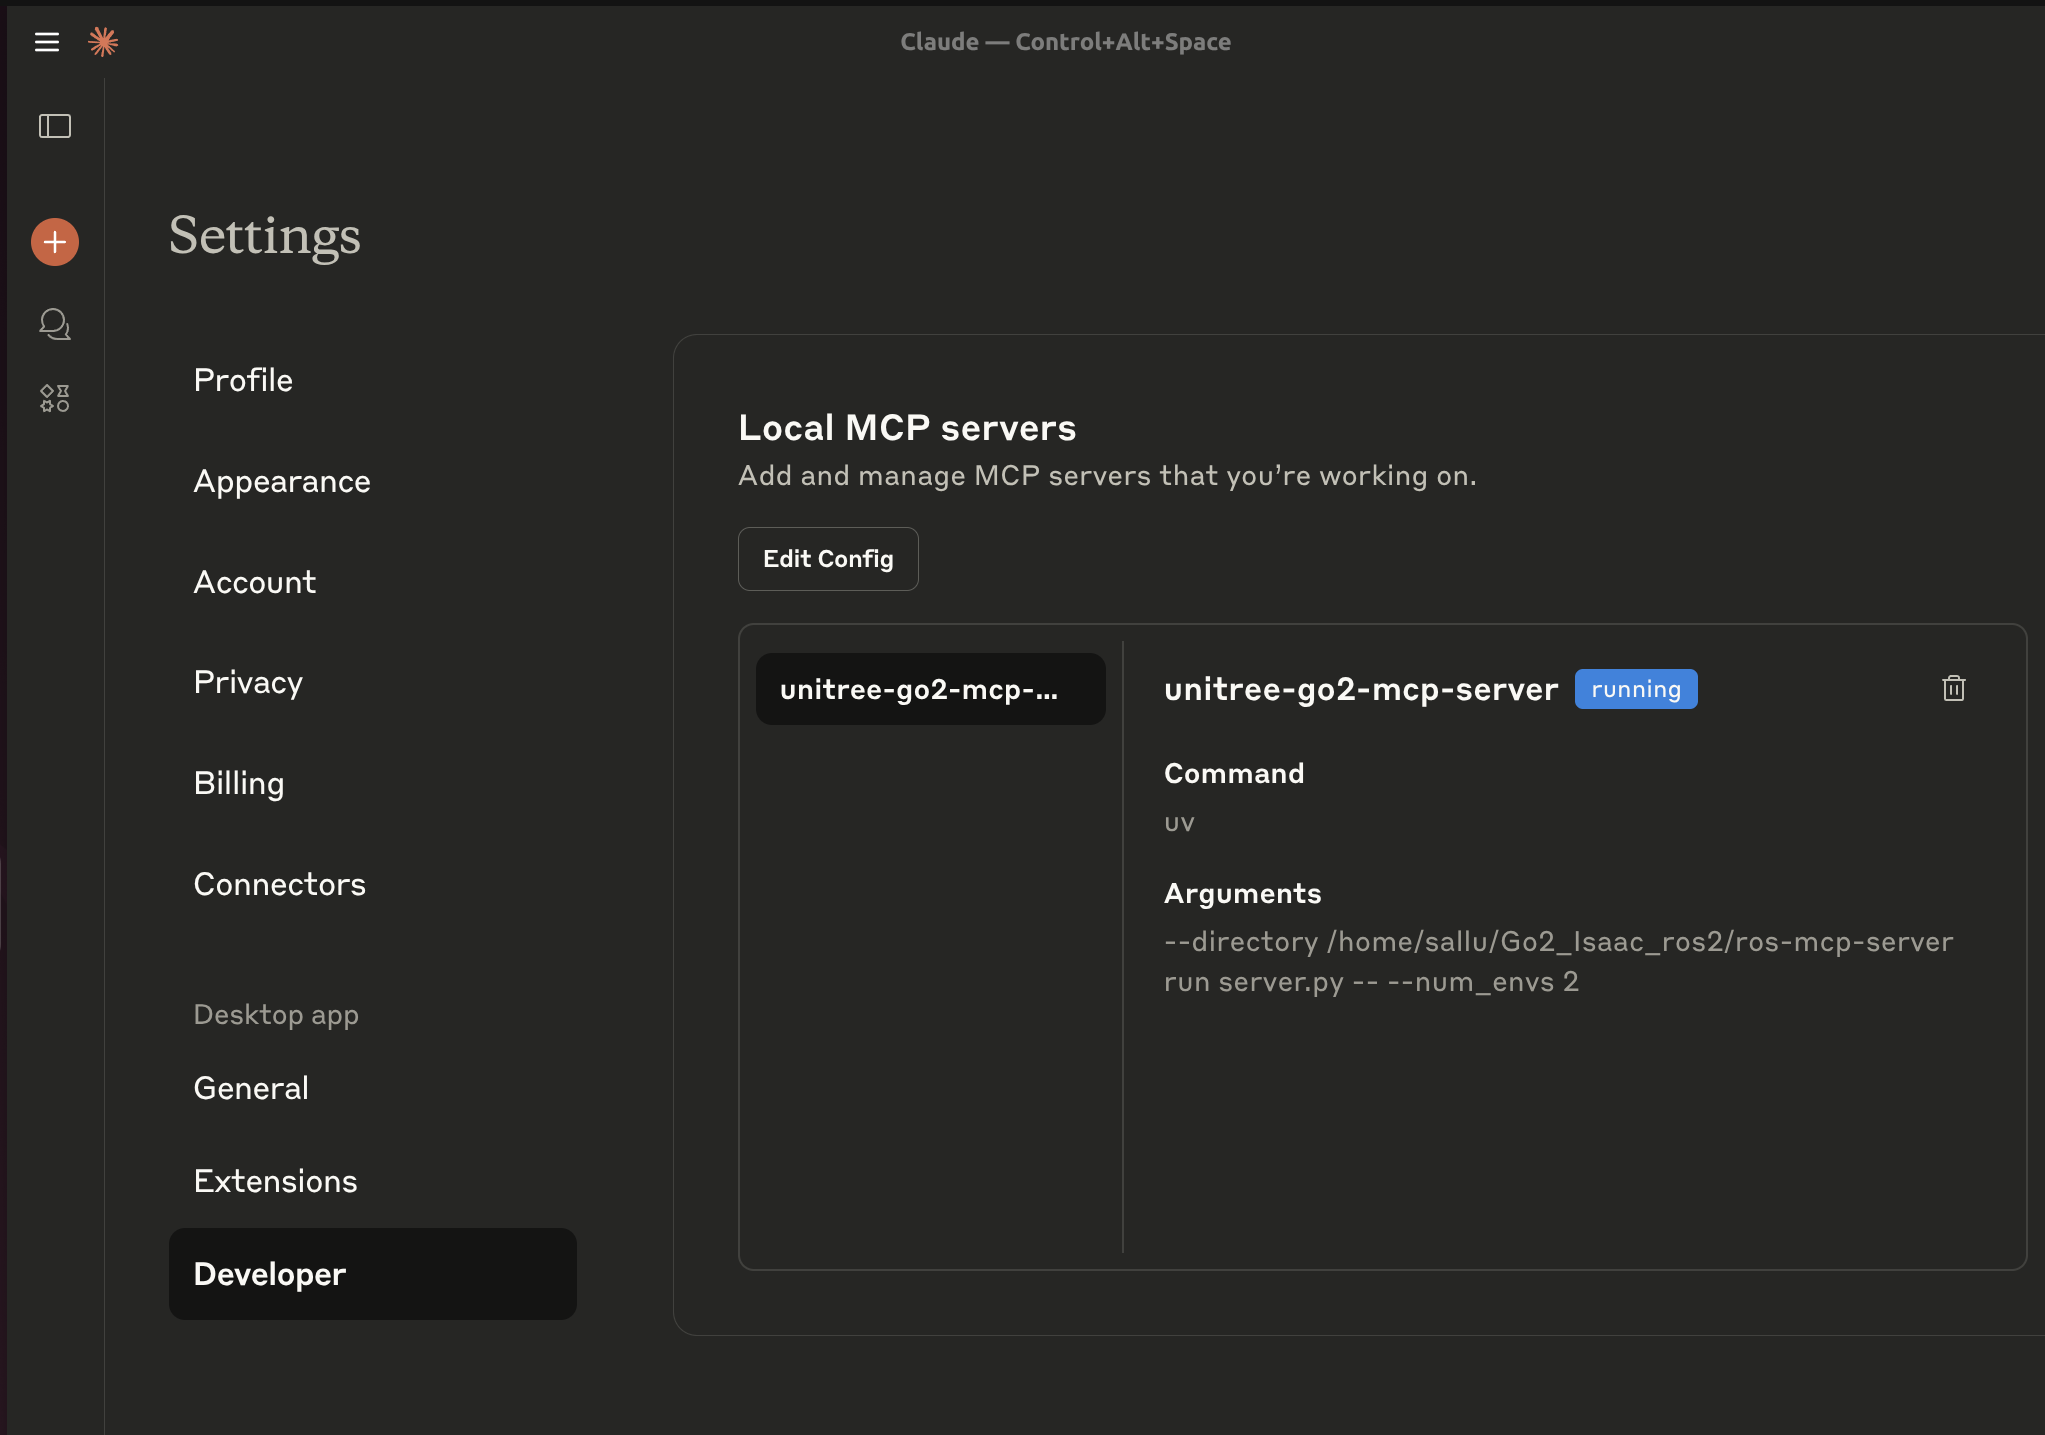
Install Claude Desktop (For Linux installation follow claude-desktop-debian).
Run claude desktop and go to developer settings and click Add MCP Server. Then paste the code given in section 2.1
MCP Config File
Paste the code in mcp.json file
{
  "mcpServers": {
    "ros-mcp-server": {
      "command": "uv",
      "args": [
        "--directory",
        "/ABSOLUTE/PATH/TO/Go2_Isaac_ros2/ros-mcp-server",,
        "run",
        "server.py"
      ]
    }
  }
}
1.1 MCP Functions
You can find the list of functions in the MCPFUNCTIONS.md.
1.2 Launch Rosbridge Server
1. Set IP and Port to connect rosbridge.
- Open
server.pyand change yourLOCAL_IP,ROSBRIDGE_IPandROSBRIDGE_PORT. (ROSBRIDGE_PORT's default value is9090)
Run rosbridge server.
ROS 1
roslaunch rosbridge_server rosbridge_websocket.launch
ROS 2
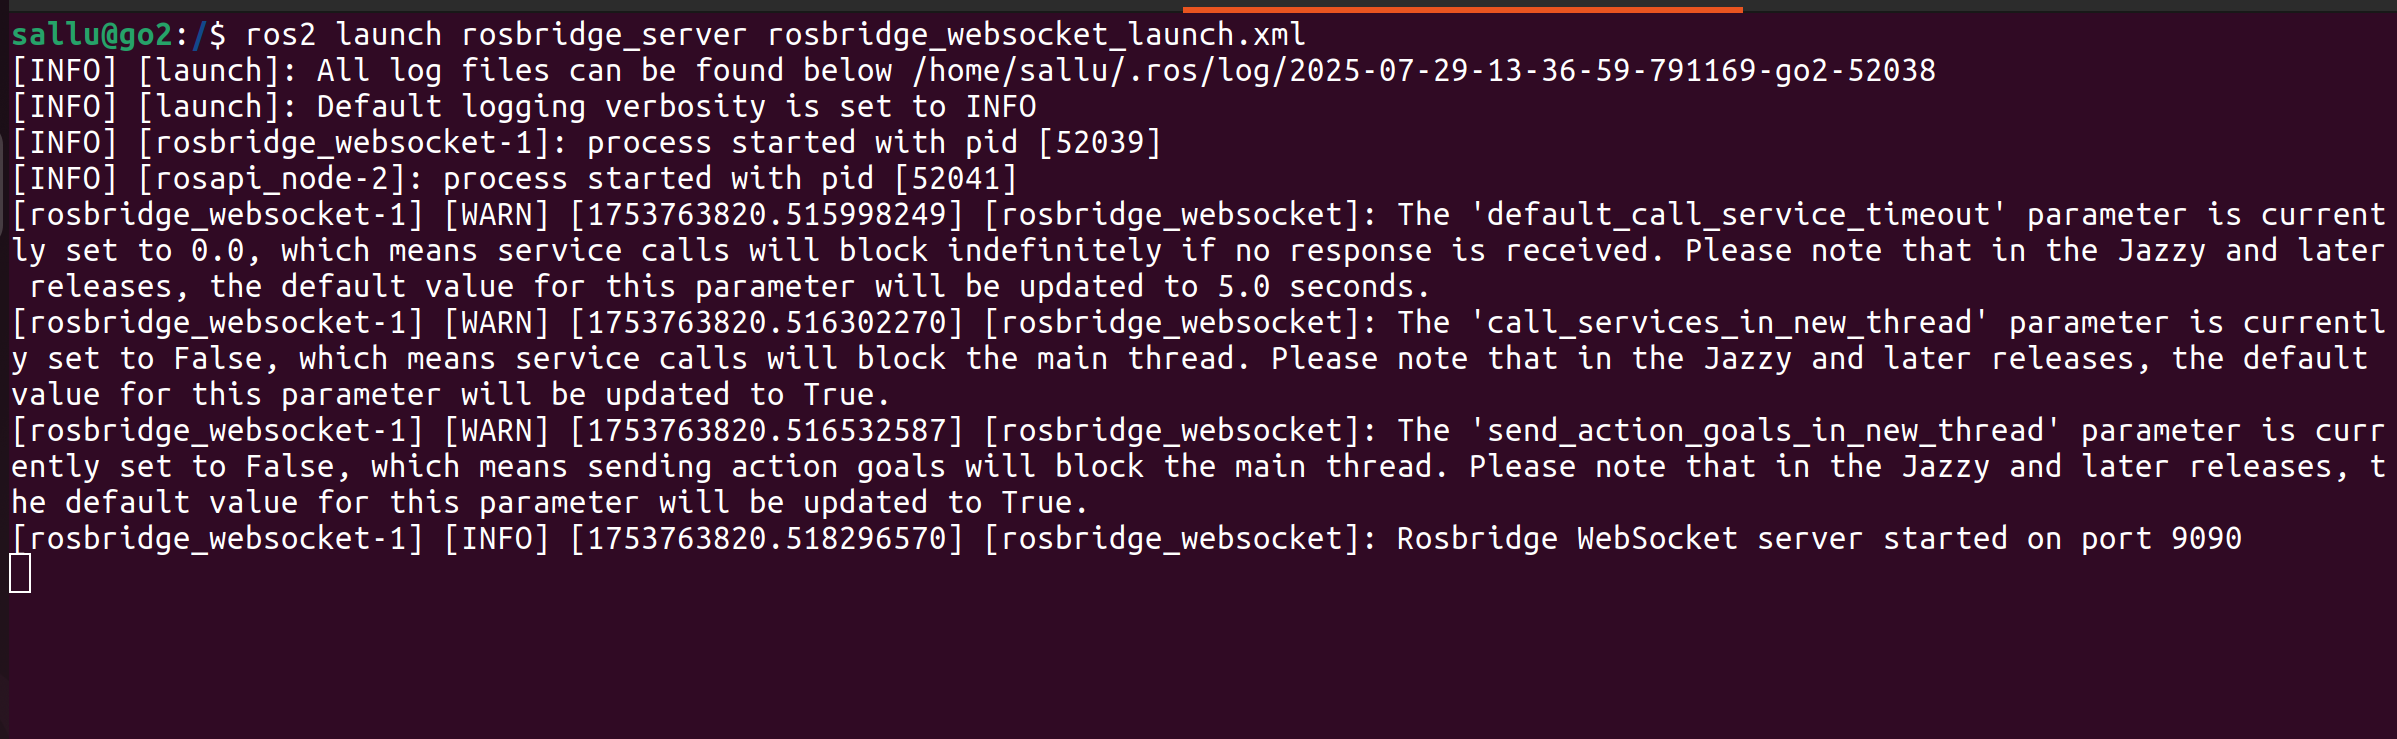
ros2 launch rosbridge_server rosbridge_websocket_launch.xml #if you dont have it install it with sudo apt command in linux
Run main.py as per README.MD
Before running, make sure num_envs in sim.yaml has same value as NUM_ENVS in server.py
Type your instructions in chat
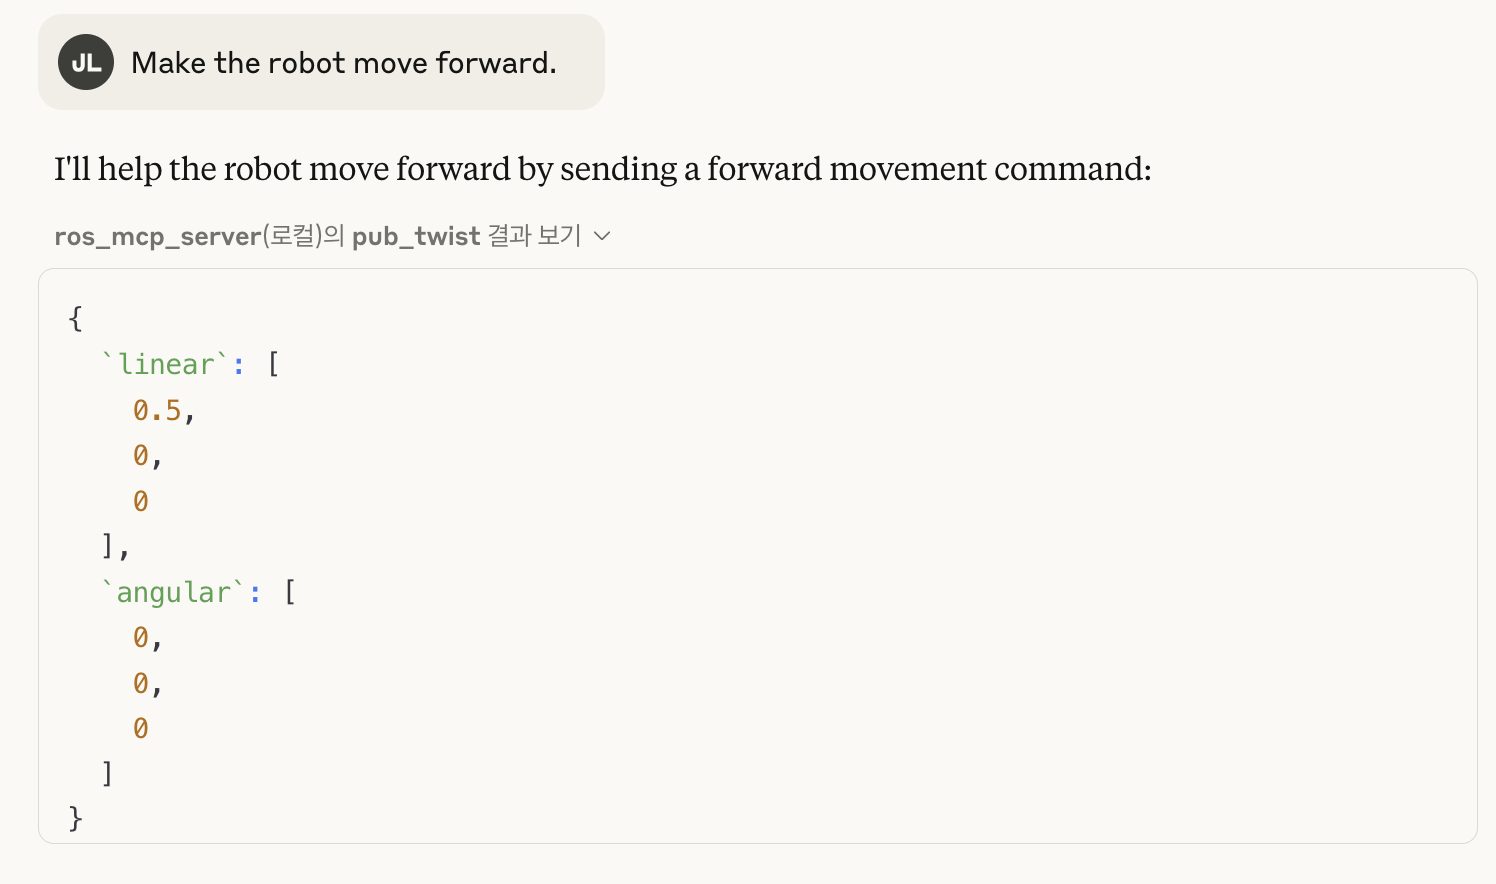
2 Launch Web Portal
To run web portal only prerequisite is step 3 (launch robsridge server). Other steps can be ignored
2.1 Activate the evironment
Assuming that you are running it with Isaac-simulation(support for real robot will be added later), First of all activate the same environment being used for running main.py program (isaaclab_env) as per README.MD
Note: If you want to create a new seperate environment for web portal then you need to install torch and numpy as well otherwise make sure you dont update/change them in existing environment or it will cause problems.
conda activate env_isaaclab #or activate your custom env
cd ~/Go2_Isaac_ros2/ros-mcp-server
pip install -r requirements_web_mcp.txt
python web_portal.py
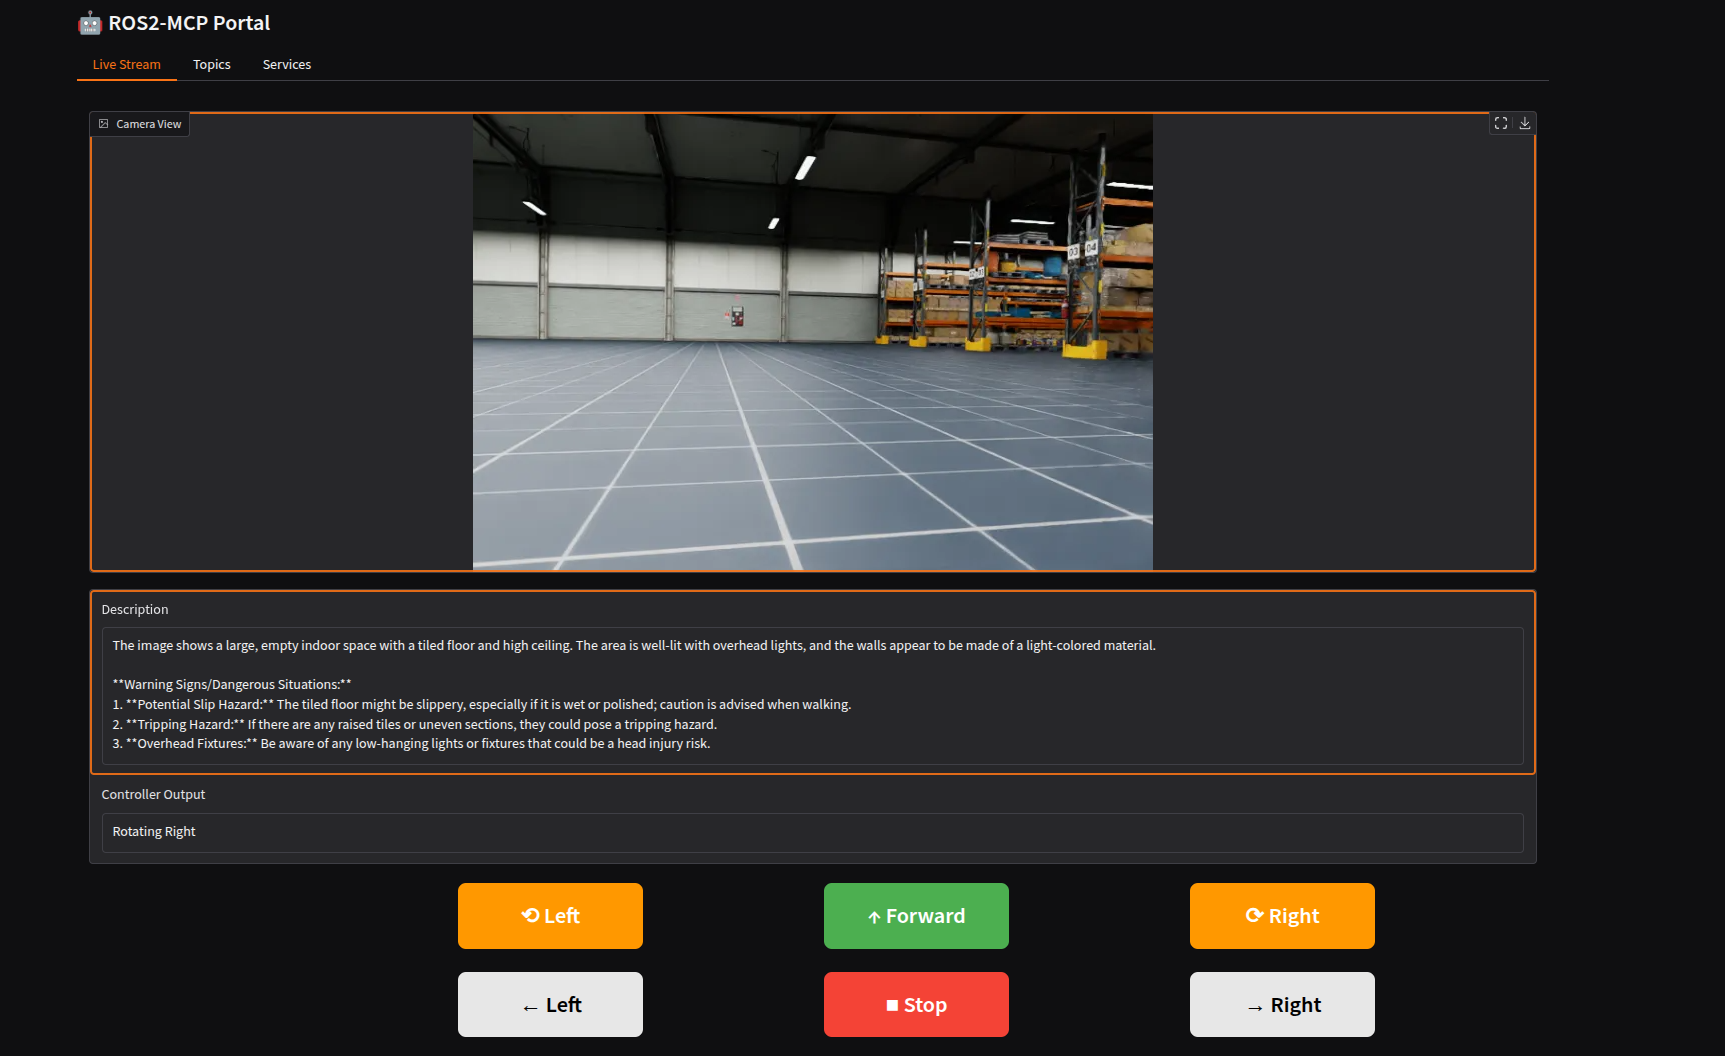
2.2 Changing Portal Settings
- You can choose which services to run in portal by setting parameters to True/False in config.py
- Button location might be different depending on screen size. You can adjust it in web_portal.py from line 90 onwards
- To run the LLM description dont forget to add your API key in config.py or use Ollama for local hosting. To change prompt go to llm_describer.py
- To add a new service make a new code such as lidar.py and initialize it in data_stream.py. From here all data needed for web_portal is acquired. All data is is gathered in data_stream class whose object is then called by web_portal.
- By default an image is sent to LLM every 5 seconds for description update. You can change it in data_stream.py
- If you want to use camera and controller for a different robot make sure you change the name of topics in config.py
- To share Web-portal with many users across network, Checkout Gradio-Mcp-Server
3. Acknowledgement
MCP Control is based on ros-mcp-server (Note: my implementation has deviated quite a bit now)
LLM description inspiration from vlm-describer
7. Citation
@MISC{Suleman2025,
  author = "Muhammad Suleman",
  title = "Ros2-MCP-Web-Portal",
  year = "2025",
  url = "https://github.com/sallu-786/Ros2-MCP-Web-Portal",
  note = "Version 1.0.0"
}
8. Contact
Installing Ros2 Web Portal
This server has no published package — it is built from source. Open the repository and follow its README.
▸ github.com/sallu-786/Ros2-MCP-Web-PortalFAQ
Is Ros2 Web Portal MCP free?
Yes, Ros2 Web Portal MCP is free — one-click install via Unyly at no cost.
Does Ros2 Web Portal need an API key?
No, Ros2 Web Portal runs without API keys or environment variables.
Is Ros2 Web Portal hosted or self-hosted?
Self-hosted: the server runs locally on your machine via the install command above.
How do I install Ros2 Web Portal in Claude Desktop, Claude Code or Cursor?
Open Ros2 Web Portal on unyly.org, pick your client tab (Claude Desktop, Claude Code, Cursor) and press Install — the config is generated automatically, no JSON editing.
Related MCPs
GitHub
PRs, issues, code search, CI status
 by GitHub
Filesystem
Secure file operations with configurable access controls.
Memory
Knowledge graph-based persistent memory system.
Template MCP Server
A CLI tool to create a new Model Context Protocol server project with TypeScript support, dual transport options, and an extensible structure
 by mcpdotdirect
Compare Ros2 Web Portal with
Not sure what to pick?
Find your stack in 60 seconds
Author?
Embed badge for your README
Browse similar
All development MCPs