
Stamp It
FreeNot checkedAn MCP server that adds full-screen text or image watermarks to images with intelligent color adaptation and multi-language support.

About
An MCP server that adds full-screen text or image watermarks to images with intelligent color adaptation and multi-language support.
README
A professional image watermarking service built with FastMCP, supporting both text and image watermarks with intelligent color adaptation.
中文文档 | English
✨ Key Features
- 🖼️ Dual Watermark Modes: Support for both text and image watermarks
- 📂 Local File Processing: Professional local image file handling
- 🎨 Smart Adaptive Colors: Automatic color selection based on image brightness
- 📐 Tilted Watermark Effects: Customizable angle tilting (default 30° upward right)
- 🌍 Multi-language Support: Chinese, English, Japanese, Korean and more
- 🎯 High-density Coverage: Complete coverage of every corner with no gaps
- 💎 High Definition: BICUBIC resampling for smooth edges
- 📁 Smart Saving: Auto-save in the same directory as original image
- ⚡ Performance Optimized: Font caching, intelligent scaling, memory management
- 🛠️ Rich Format Support: Supports 7 common image formats
📖 Usage
MCP Client Configuration
Cherry Studio (Recommended)
Open Cherry Studio Settings
- Go to Settings → MCP Servers
- Click "Add Server"
Configure MCP Server
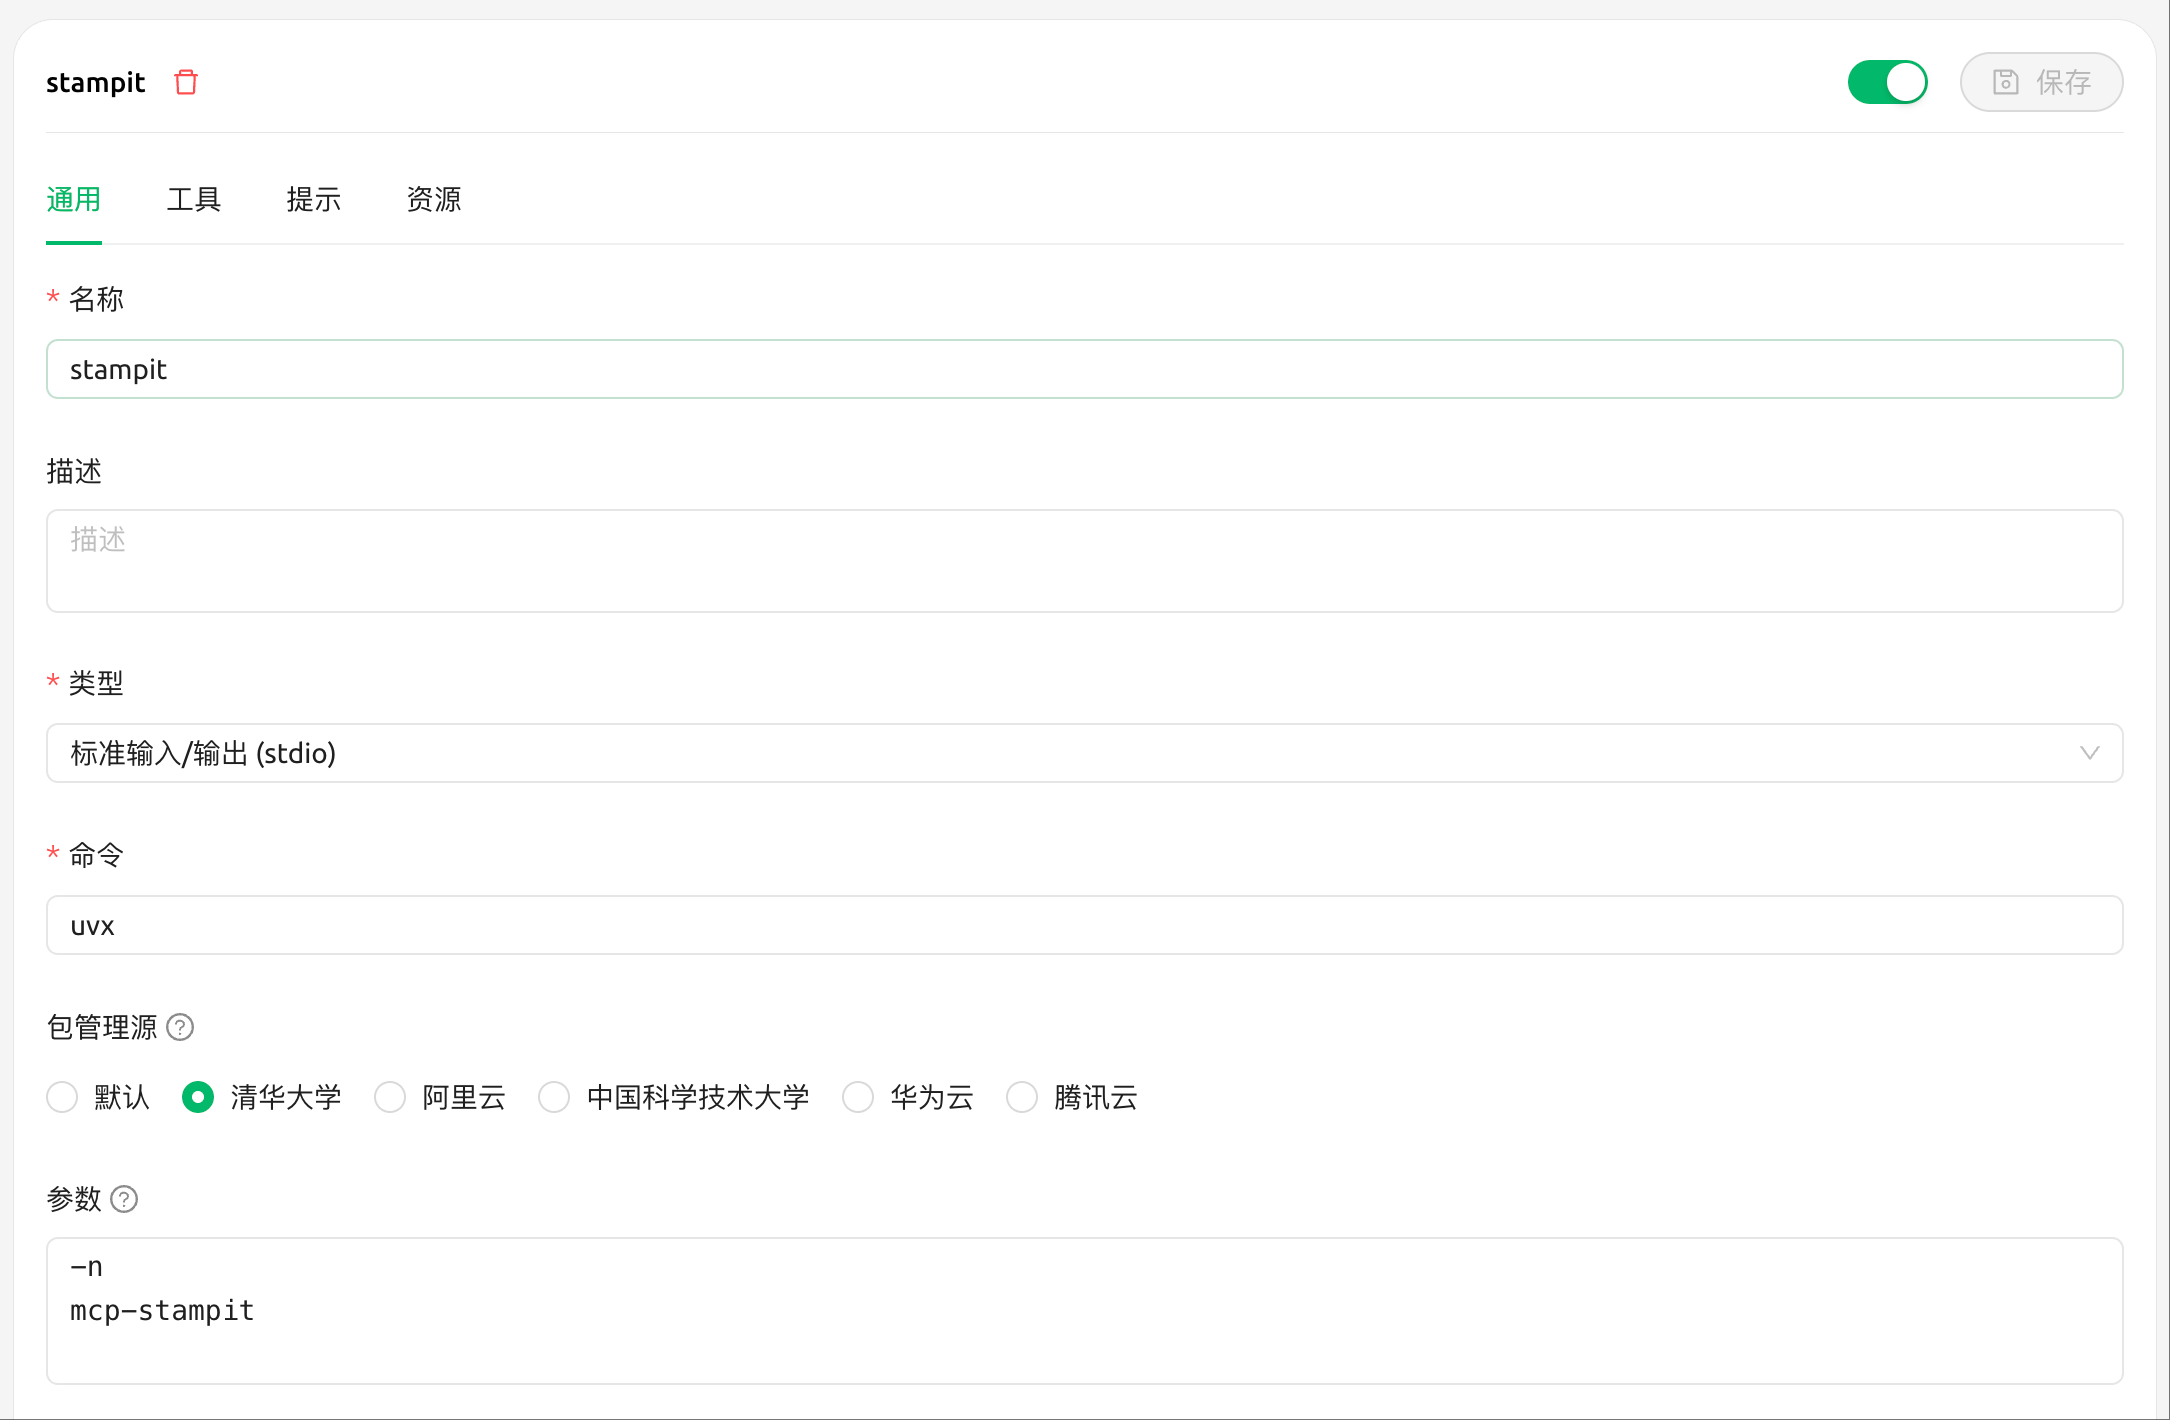
Save and Connect
- Click "Save" to add the server
- The server will automatically connect
- You can now use the watermark tools in Cherry Studio
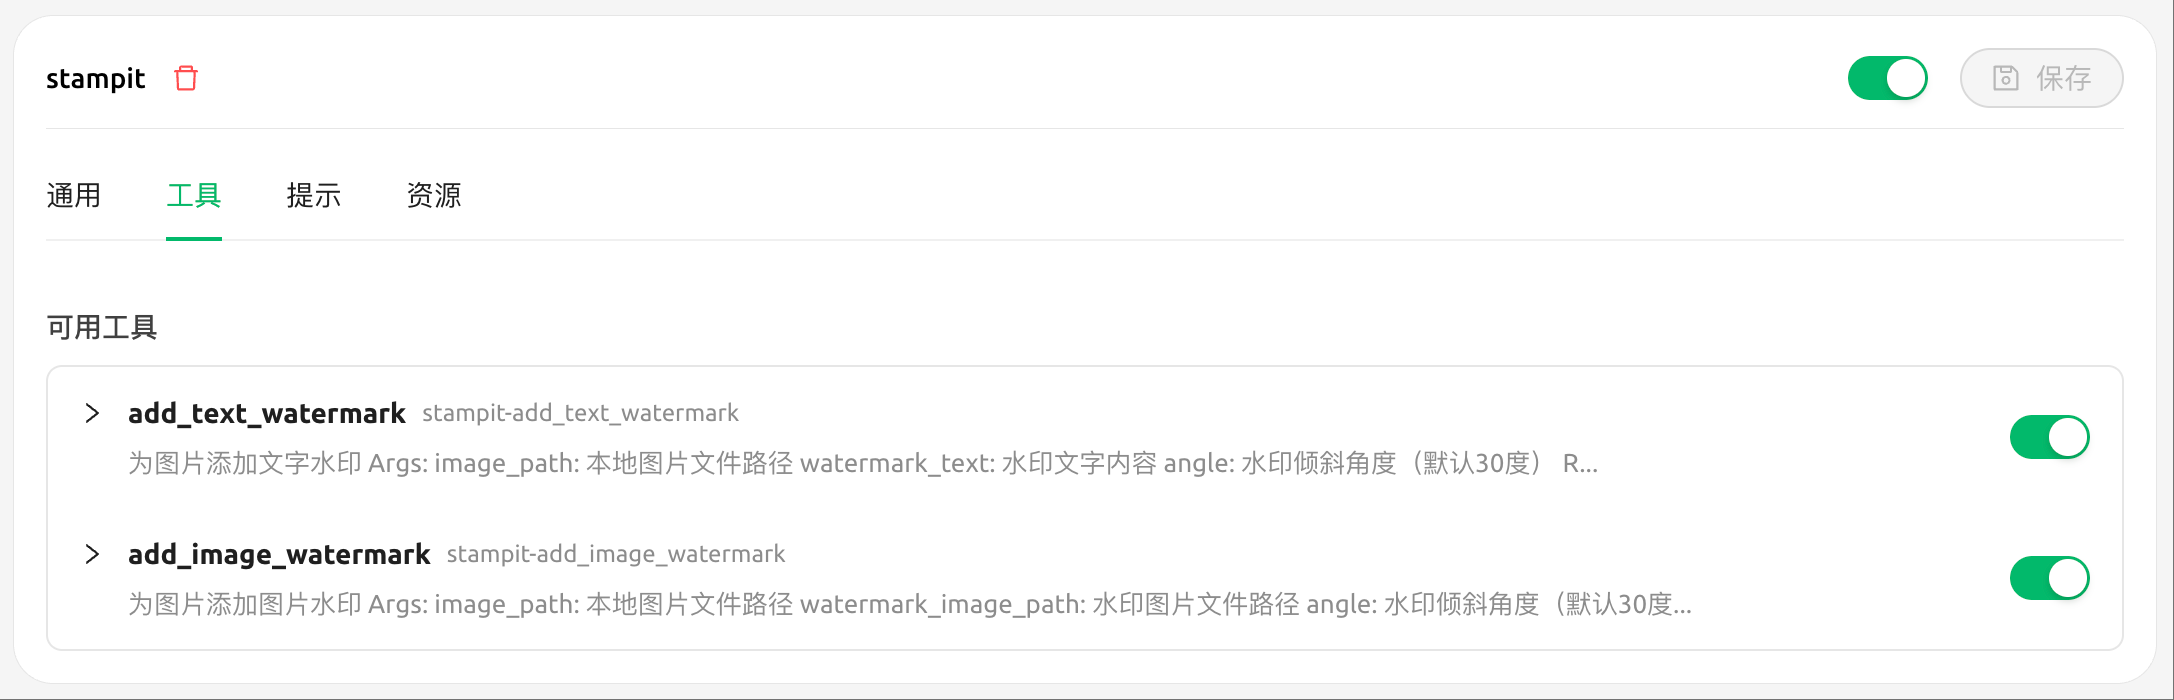
Cursor
Open Cursor Settings
- Use shortcut
Cmd+,(Mac) orCtrl+,(Windows/Linux) - Or click Settings → Preferences
- Use shortcut
Configure MCP Server
- Find "MCP Servers" configuration option
- Add the following configuration:
{
  "mcpServers": {
    "stampit": {
      "command": "uvx",
      "args": [
        "mcp-stampit"
      ]
    }
  }
}
- Save and Restart
- Save the configuration file
- Restart Cursor for changes to take effect
- You can now use the watermark tools in Cursor
📦 Preview
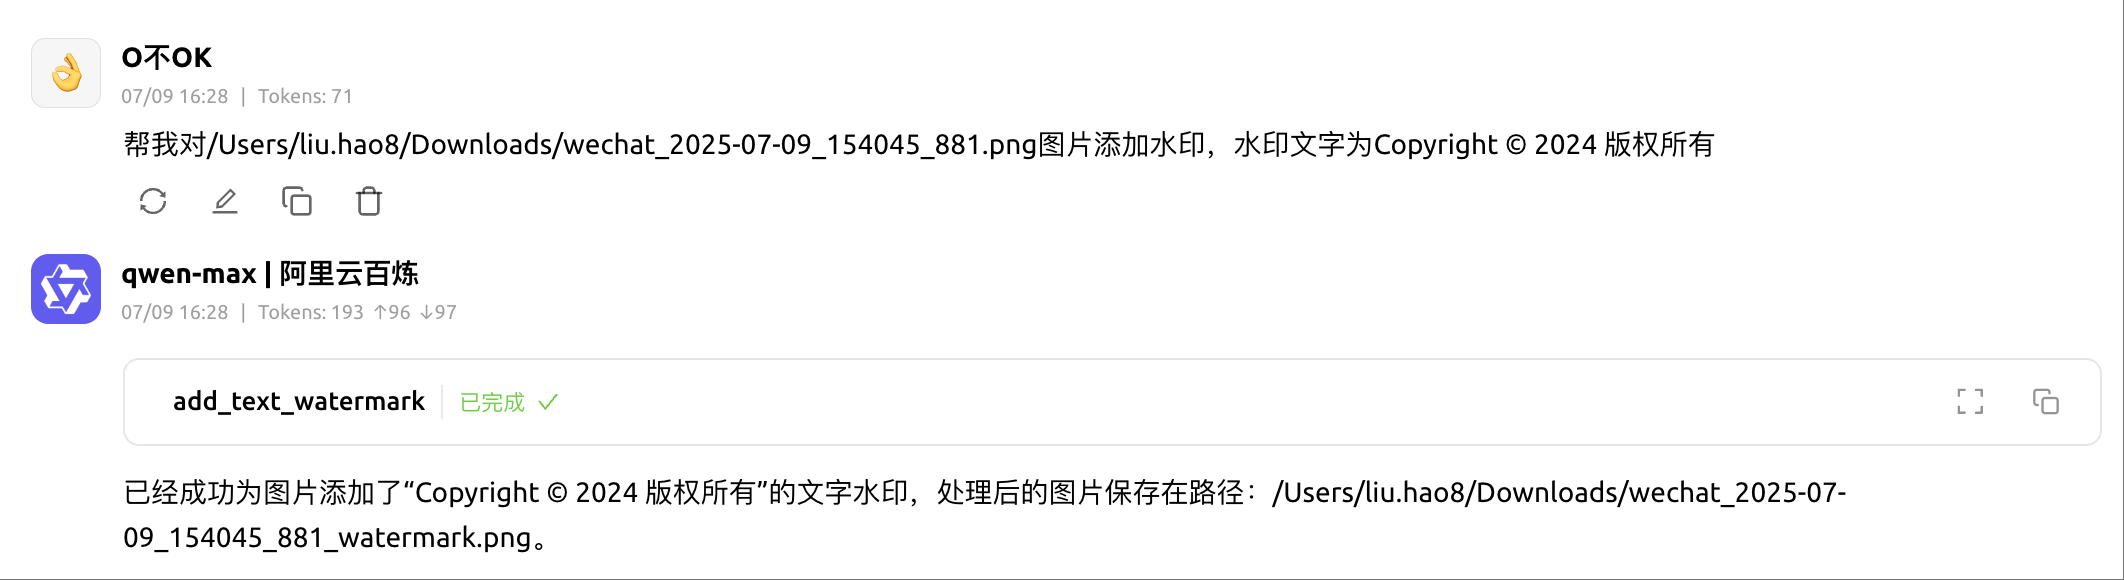
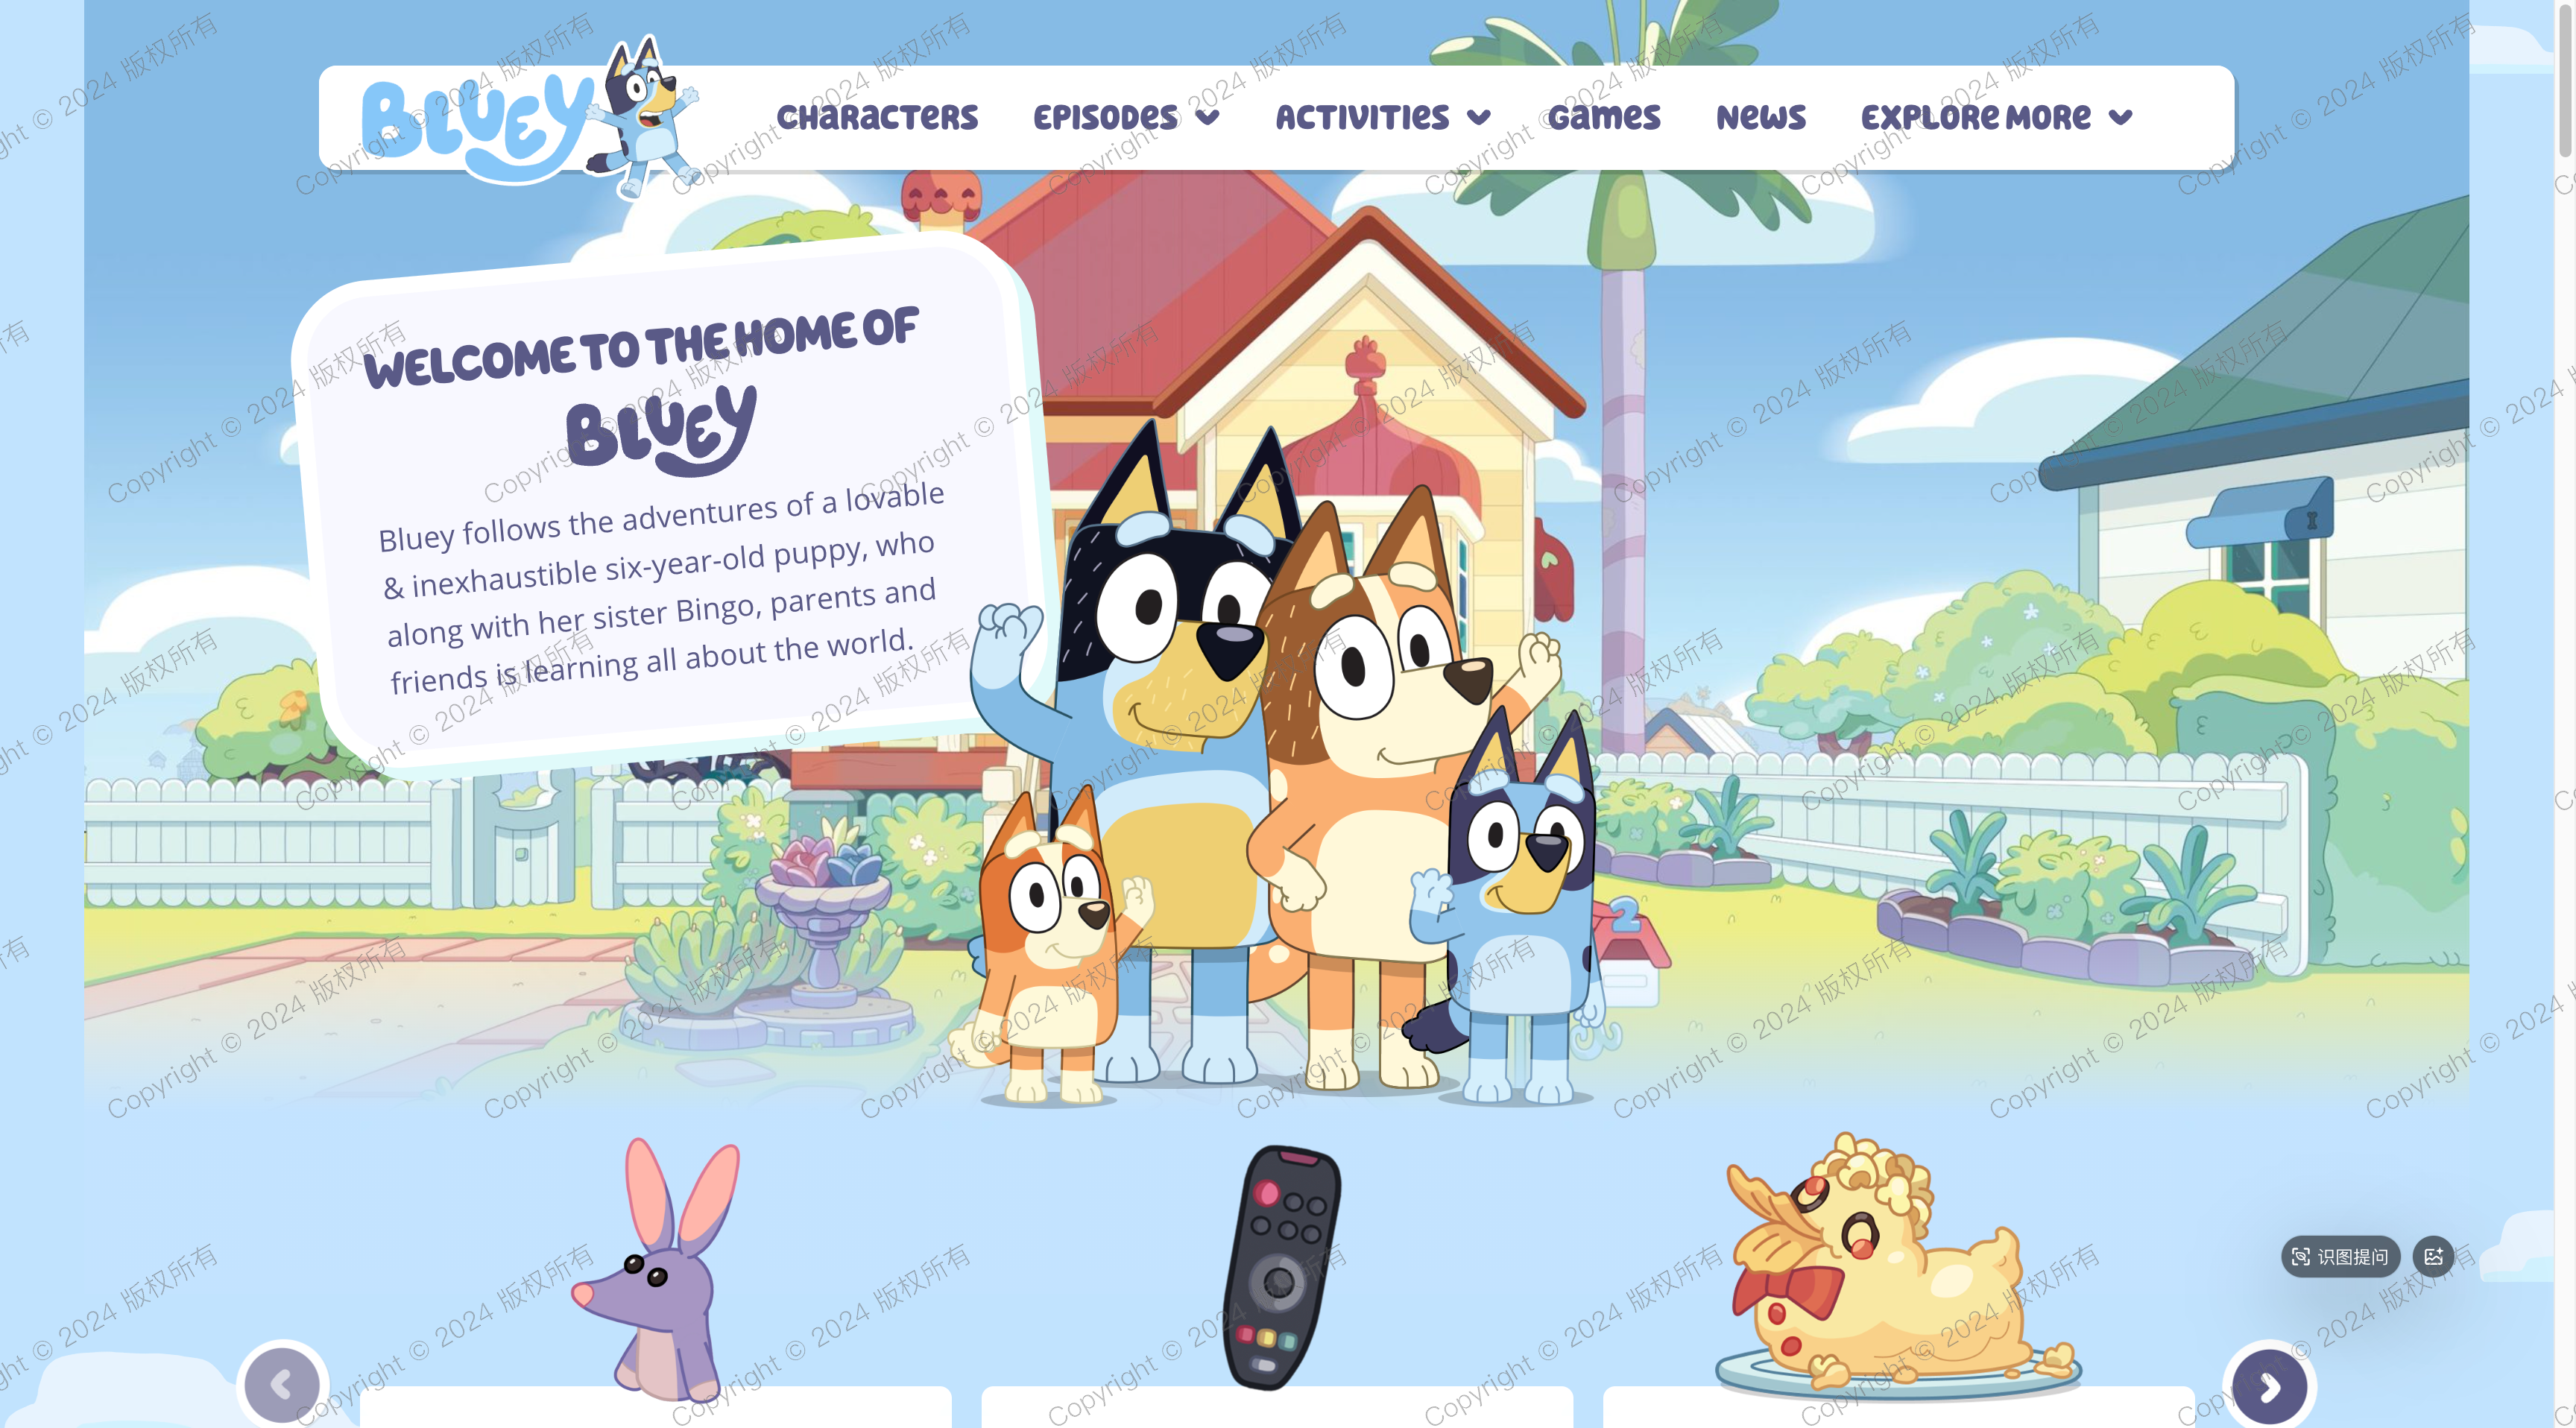
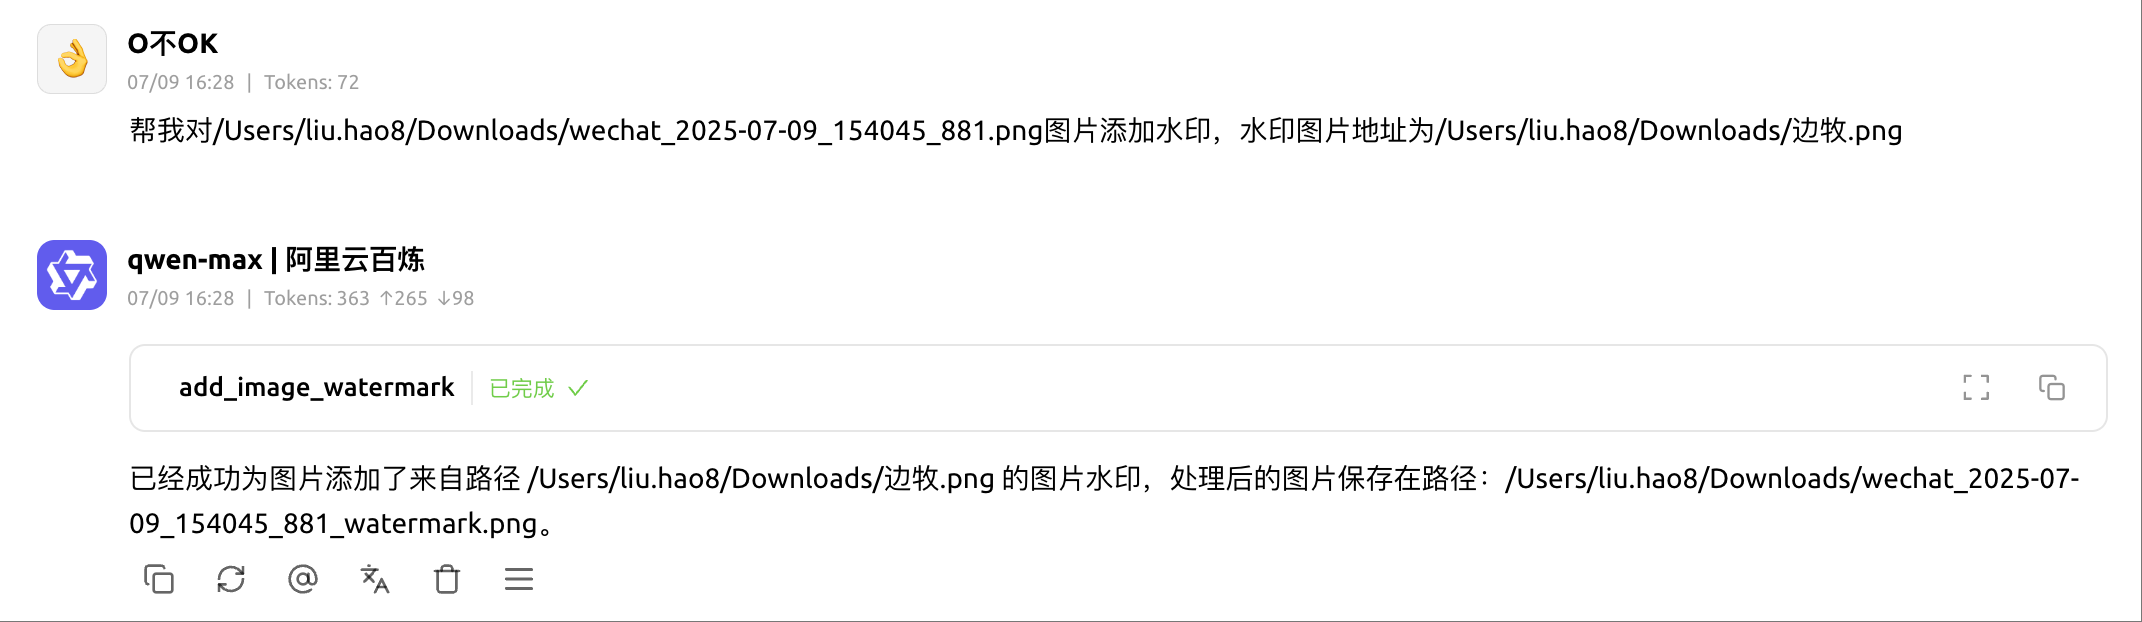
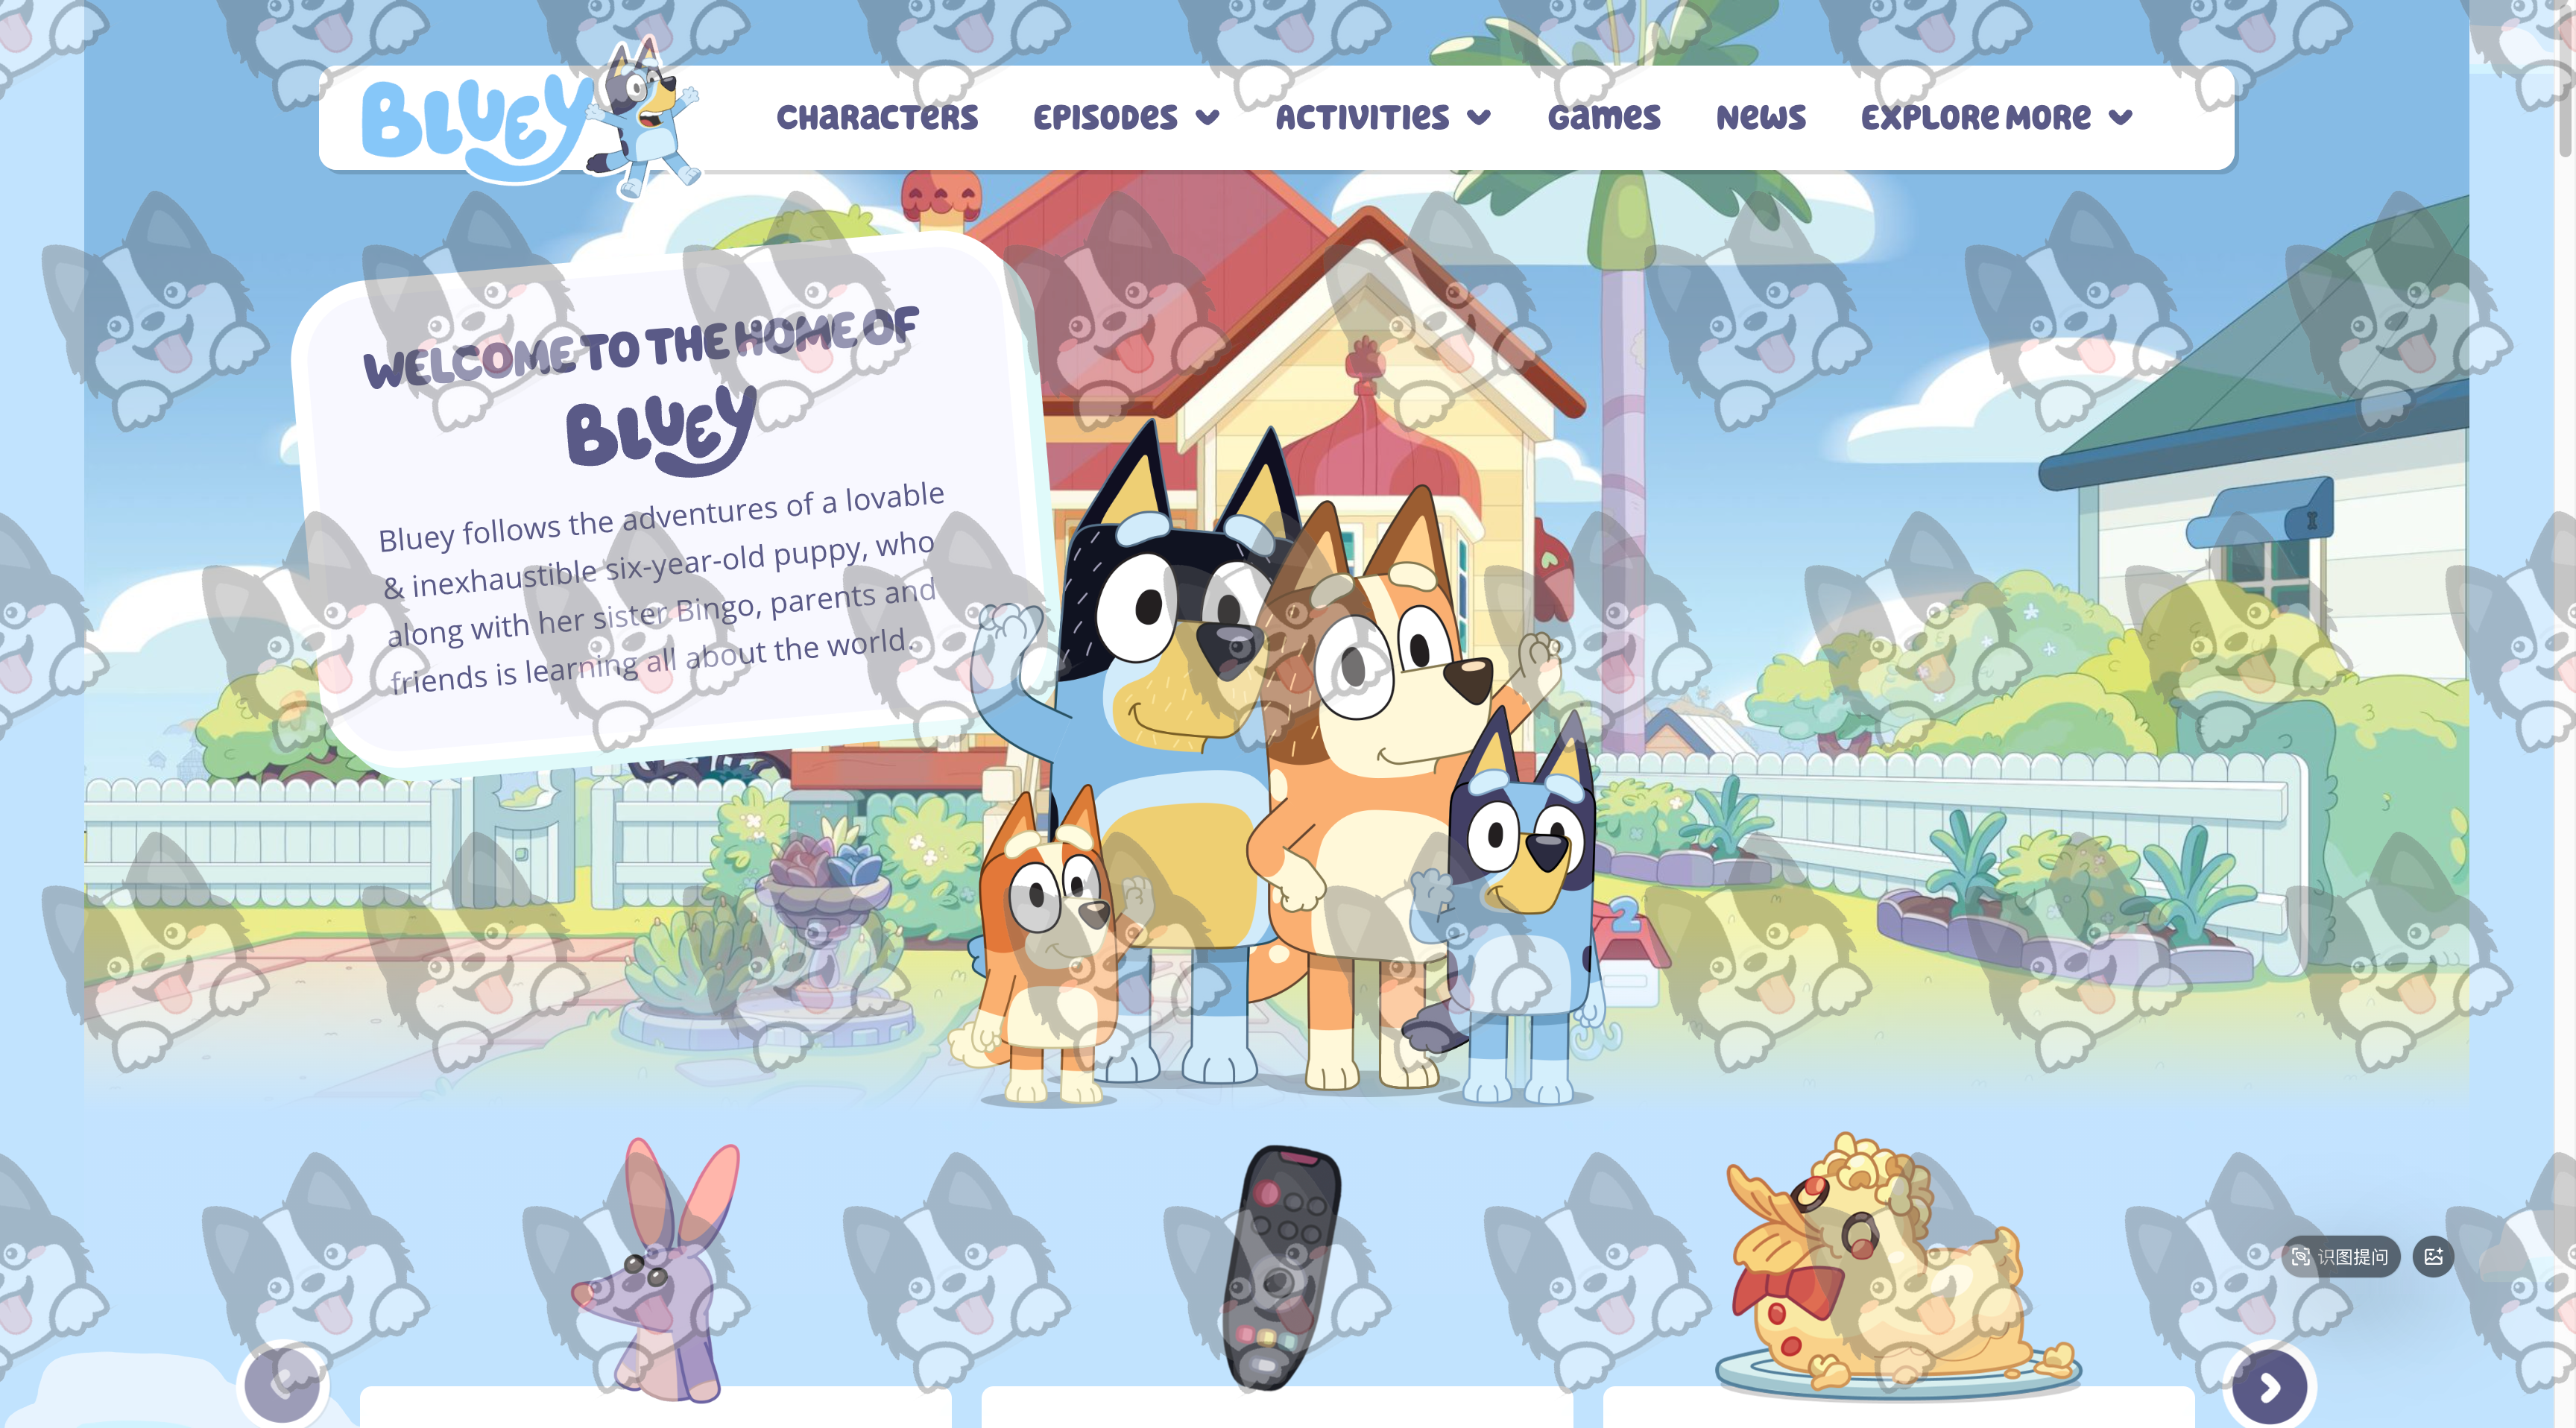
🚀 Installation
Using uv (Recommended)
# Install dependencies
uv pip install fastmcp pillow

# Or install using project configuration
uv pip install -e .
Using pip
pip install fastmcp pillow
Start the MCP Server (Standalone)
python main.py
After the server starts, you will see output similar to:
╭─ FastMCP 2.0 ──────────────────────────────────────────────────────────────────╮
│   🖥️  Server name:     Stamp it - Apply a full-screen watermark to an image    │
│   📦 Transport:       STDIO                                                    │
╰────────────────────────────────────────────────────────────────────────────────╯
Available MCP Tools
add_text_watermark - Text Watermark
Add intelligent text watermarks to images with multi-language support and adaptive colors.
Parameters:
image_path(str): Local image file pathwatermark_text(str): Watermark text contentangle(float, optional): Watermark tilt angle, default 30°
Usage Examples:
# Basic text watermark
add_text_watermark("/Users/photos/vacation.jpg", "My Copyright")

# Custom angle
add_text_watermark("./document.png", "Confidential", angle=45)

# Multi-language watermark
add_text_watermark("photo.jpg", "Copyright © 2024 All Rights Reserved")
add_image_watermark - Image Watermark
Add image watermarks to photos, supporting logos, signatures, and other images as watermarks.
Parameters:
image_path(str): Local image file pathwatermark_image_path(str): Watermark image file pathangle(float, optional): Watermark tilt angle, default 30°
Usage Examples:
# Add logo watermark
add_image_watermark("/Users/photos/product.jpg", "/Users/logos/company_logo.png")

# Custom angle logo watermark
add_image_watermark("photo.jpg", "signature.png", angle=0)

# Brand watermark
add_image_watermark("marketing_image.jpg", "brand_watermark.png", angle=15)
🎨 Watermark Features
📝 Text Watermark Features
Smart Color Adaptation
- Bright images: Automatically use dark watermarks (RGB 20,20,20)
- Dark images: Automatically use light/white watermarks (RGB 240,240,240)
- Medium brightness: Intelligently select optimal contrast colors
Multi-language Font Support
- Auto-detect and load system's best Chinese fonts
- Support for PingFang SC, Microsoft YaHei, SimHei, etc.
- Perfect display of Chinese, Japanese, Korean, and English
High-quality Rendering
- Font caching for improved performance
- BICUBIC resampling for smooth edges
- Centered rendering with excellent rotation effects
🖼️ Image Watermark Features
- Smart Scaling: Auto-scale to appropriate size (default 15%)
- Opacity Control: Automatic opacity adjustment without affecting original image
- Aspect Ratio Preservation: Maintain watermark image aspect ratio
- High-quality Scaling: Use LANCZOS algorithm for clarity
🎯 Layout Algorithm
- Complete Coverage: Start from outside image boundaries for 100% coverage
- Staggered Arrangement: Odd-even row offset for more natural visual effect
- Dense Distribution: Optimized spacing algorithm, 40% higher density than traditional methods
- Edge Handling: Complete watermark coverage in all four corners
📁 File Output
Save Rules
- Save Location: Auto-save in the same directory as original image
- Naming Convention: Original filename +
_watermark+ extension - Format Preservation: Maintain original image format and quality
- Optimized Saving: Enable compression optimization to reduce file size
Output Examples
Input:  /Users/photos/vacation.jpg
Output: /Users/photos/vacation_watermark.jpg

Input:  ./designs/logo.png
Output: ./designs/logo_watermark.png

Input:  document.pdf.png
Output: document.pdf_watermark.png
🛠️ Supported Image Formats
| Format | Extensions | Read | Save | Transparency | Optimized |
|---|---|---|---|---|---|
| JPEG | .jpg, .jpeg | ✅ | ✅ | ❌ | ✅ |
| PNG | .png | ✅ | ✅ | ✅ | ✅ |
| GIF | .gif | ✅ | ✅ | ✅ | ✅ |
| BMP | .bmp | ✅ | ✅ | ❌ | ✅ |
| TIFF | .tiff, .tif | ✅ | ✅ | ✅ | ✅ |
| WebP | .webp | ✅ | ✅ | ✅ | ✅ |
🌍 Multi-language Font Support
Supported Languages
- Chinese: Simplified & Traditional Chinese
- Japanese: ひらがな、カタカナ、漢字
- Korean: 한글 (Hangul)
- English: Latin character set
- Others: Most Unicode characters
Font Priority
macOS System:
- PingFang SC (Apple's default Chinese font)
- STHeiti Light (Chinese typography)
- Hiragino Sans GB (Winter Blue font)
- Arial Unicode (Universal Unicode font)
Windows System:
- Microsoft YaHei
- SimSun
- SimHei
Linux System:
- DejaVu Sans
- Liberation Sans
- Noto Sans CJK
- WenQuanYi Zen Hei
📂 Project Structure
stampit/
├── main.py                   # Main program and MCP server
├── pyproject.toml            # Project configuration
├── README.md                 # English project documentation
├── README_CN.md              # Chinese project documentation
├── uv.lock                   # Dependency lock file
└── LICENSE                   # License file
🧪 Quick Testing
Test Text Watermark
# 1. Start server
python main.py

# 2. Call in MCP client
add_text_watermark("path/to/your/image.jpg", "Test Watermark")
Test Image Watermark
# 1. Prepare a logo image
# 2. Call in MCP client
add_image_watermark("path/to/your/photo.jpg", "path/to/logo.png")
⚙️ Technical Details
Core Algorithms
- Brightness Calculation: Grayscale conversion + pixel average algorithm
- Color Adaptation: Four-tier classification system based on brightness thresholds
- Position Calculation: Staggered grid + edge offset algorithm
- Rendering Optimization: BICUBIC/LANCZOS resampling technology
Performance Optimization
- Font Caching: Avoid repeated font file loading
- Smart Scaling: Brightness calculation using 50x50 small images for speed
- Memory Management: Timely release of temporary layers and cache
- Batch Processing: Support for efficient batch image processing
Quality Assurance
- Edge Smoothing: Use high-quality resampling algorithms
- Color Fidelity: Preserve original image color space and mode
- Transparency Handling: Proper RGBA channel processing
- Format Compatibility: Smart conversion between different image formats
🔧 Advanced Configuration
You can adjust parameters by modifying the WatermarkConfig class:
class WatermarkConfig:
    DEFAULT_FONT_SIZE = 36          # Default font size
    DEFAULT_ANGLE = 30              # Default tilt angle
    SPACING_X_FACTOR = 1.1          # Horizontal spacing multiplier
    SPACING_Y_FACTOR = 0.9          # Vertical spacing multiplier
    BRIGHTNESS_THRESHOLDS = {       # Brightness thresholds
        'very_bright': 180,
        'medium': 120,
        'dark': 60
    }
Custom Parameter Suggestions
- Dense Watermarks: Lower spacing multipliers (0.8, 0.7)
- Sparse Watermarks: Higher spacing multipliers (1.5, 1.3)
- Large Fonts: Increase font size (48, 54)
- Small Fonts: Decrease font size (24, 30)
🎛️ Usage Tips
Text Watermark Tips
- Copyright Info: Use "© 2024 Company Name" format
- Multi-language: Mixed Chinese-English works better
- Angle Selection: 30° most natural, 45° more prominent, 0° for documents
Image Watermark Tips
- Logo Design: Use transparent background PNG format
- Size Control: Logo shouldn't be too large, recommend within 15% of original
- Color Matching: Choose logo colors with appropriate contrast to original image
💡 Best Practices
Batch Processing Recommendations
# Recommended batch processing method
images = ["photo1.jpg", "photo2.jpg", "photo3.jpg"]
watermark_text = "© 2024 My Company"

for image_path in images:
    result = add_text_watermark(image_path, watermark_text)
    print(result)
Performance Optimization Suggestions
- Use same font size in batches to leverage font caching
- Avoid frequent angle changes to reduce computational overhead
- Use small-sized image watermarks to improve processing speed
📄 License
This project is licensed under the Apache 2.0 License - see the LICENSE file for details.
🤝 Contributing
Issues and Pull Requests are welcome!
Contributing Guidelines
- Fork the project
- Create a feature branch
- Commit your changes
- Submit a Pull Request
📞 Technical Support
For questions or suggestions:
- Submit GitHub Issues
- Check project documentation
- Contact development team
🎉 Thank you for using Stamp it!
Install Stamp It in Claude Desktop, Claude Code & Cursor
unyly install stamp-itInstalls into Claude Desktop, Claude Code, Cursor & VS Code — handles npx, uvx and build-from-source repos for you.
First time? Get the CLI: curl -fsSL https://unyly.org/install | sh
Or configure manually
Run in your terminal:
claude mcp add stamp-it -- uvx mcp-stampitFAQ
Is Stamp It MCP free?
Yes, Stamp It MCP is free — one-click install via Unyly at no cost.
Does Stamp It need an API key?
No, Stamp It runs without API keys or environment variables.
Is Stamp It hosted or self-hosted?
Self-hosted: the server runs locally on your machine via the install command above.
How do I install Stamp It in Claude Desktop, Claude Code or Cursor?
Open Stamp It on unyly.org, pick your client tab (Claude Desktop, Claude Code, Cursor) and press Install — the config is generated automatically, no JSON editing.
Related MCPs
Omni Video
An MCP server that transforms LLM-enabled IDEs into professional video editors by pre-processing footage into text proxies, generating motion graphics via HTML/
 by buildwithtaza
ARA
Generate images, video and audio from any AI agent — one connector.
 by ARA
YouTube
Transcripts, channel stats, search
 by YouTube
EverArt
AI image generation using various models.
 by modelcontextprotocol
Compare Stamp It with
Not sure what to pick?
Find your stack in 60 seconds
Author?
Embed badge for your README
Browse similar
All media MCPs